Bedazzling Ideas

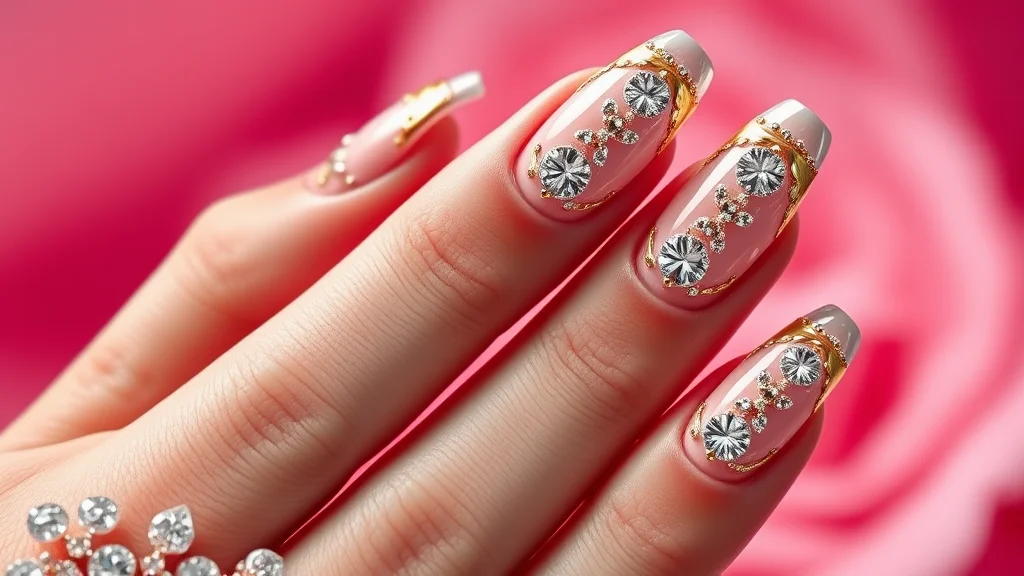
Bedazzling nails involve the strategic application of rhinestones, crystals, studs, and charms to create high-impact, three-dimensional nail art. To achieve a professional, long-lasting finish, you must use high-viscosity nail glue or thick base gel to anchor embellishments without compromising the polish integrity. While DIY kits exist, the secret to the viral, ‘glass-slipper’ aesthetic currently trending on social media lies in the specific layering techniques used by top technicians. Whether you are aiming for red-carpet glamour or subtle everyday sparkle, the exact polish to layer under your gems makes all the difference in longevity and refraction. At [Nailosmetic](https://nailosmetic.com/), we have spent years perfecting the balance between structural integrity and aesthetic opulence. Curious why everyone is switching to encapsulated crystals instead of surface-glued charms? The answer lies in durability. Let’s dive into the ultimate blueprint for mastering the art of the bedazzled manicure.
What are the essential tools for professional bedazzling?
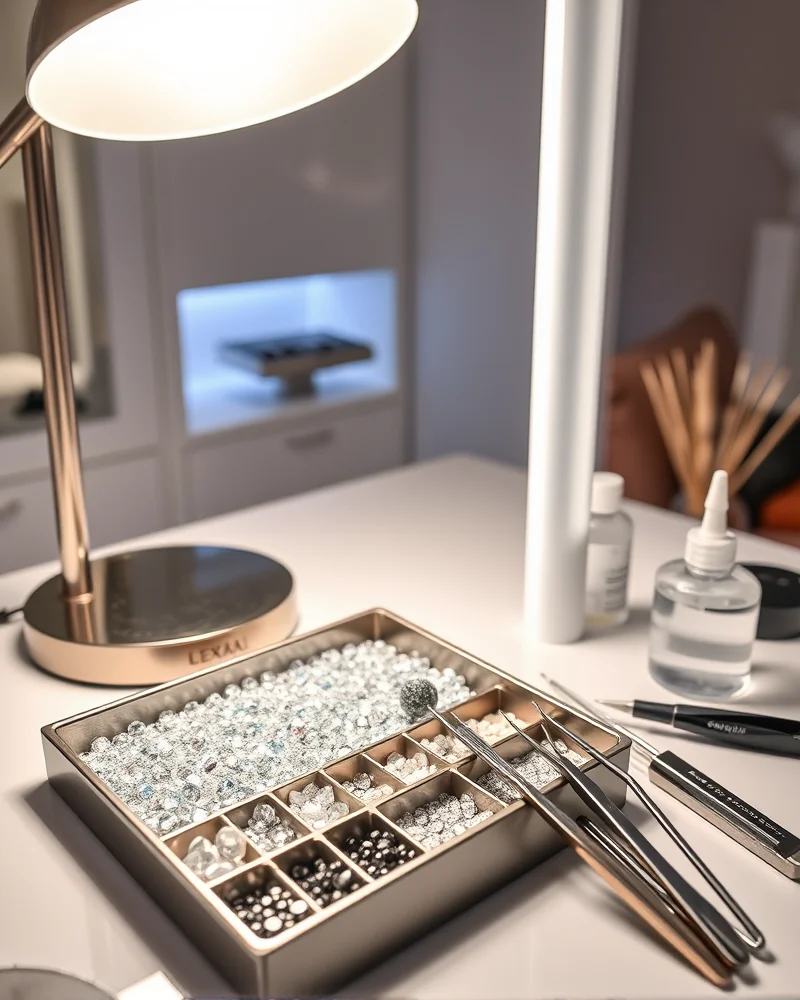
Achieving a professional finish in nail art requires more than just creativity. It demands a specific arsenal of high quality implements designed to handle delicate adornments with surgical precision. When you are looking to elevate your manicures from standard to spectacular, your toolkit becomes the most critical factor in ensuring longevity and aesthetic brilliance. Below are the essential components every nail artist should master to produce flawless results.
- Precision Wax Pencils: These are indispensable for picking up individual rhinestones without the frustration of static or stickiness. A high quality wax tip allows you to touch the top of the crystal and place it exactly where you intend. Unlike manual manipulation, a wax pencil prevents the oil from your skin from clouding the surface of the gem.
- Anti Magnetic Precision Tweezers: For stones that are exceptionally small or require a shift once placed on the nail surface, fine tipped tweezers are mandatory. Look for professional grade, non magnetic stainless steel options. They offer the necessary grip tension to navigate the curve of a nail without scratching the facets of your crystals.
- High Viscosity Rhinestone Gel: Ordinary top coats are often too thin to hold heavy crystals in place. You need a dedicated, non leveling, high viscosity adhesive gel. This thick formula acts as a structural anchor, allowing you to nestle the stone into the gel so it does not shift during the curing process.
- Powerful UV or LED Curing Lamps: The durability of your bedazzling work depends on a complete cure. Ensure your lamp has a high wattage output to penetrate the thicker adhesive gel. If the gel does not cure completely, the crystals will pop off within days.
- Varied Crystal Sizes and Shapes: A professional look relies on depth. Use a mix of crystal sizes, such as SS3 for gaps and SS12 for focal points. Creating a clustered look requires different dimensions to fill the nail bed naturally.
- Quality Materials Matter: The debate between Swarovski crystals and acrylic alternatives is a matter of light refraction. Swarovski crystals are precision cut, leaded glass that captures light from every angle, providing an unmatched sparkle that acrylic simply cannot replicate. While acrylic stones are cost effective for practice, they tend to dull and scratch quickly. For a true luxury Nailosmetic experience, always invest in authentic glass crystals to ensure your work maintains its brilliance throughout the entire duration of the wear.
By mastering these professional tools, you transform your workspace into a studio where precision meets luxury. Remember that the secret to a long lasting crystal manicure is not just the placement, but the strategic use of these professional grade supplies.
How do you apply crystals so they stay on for weeks?
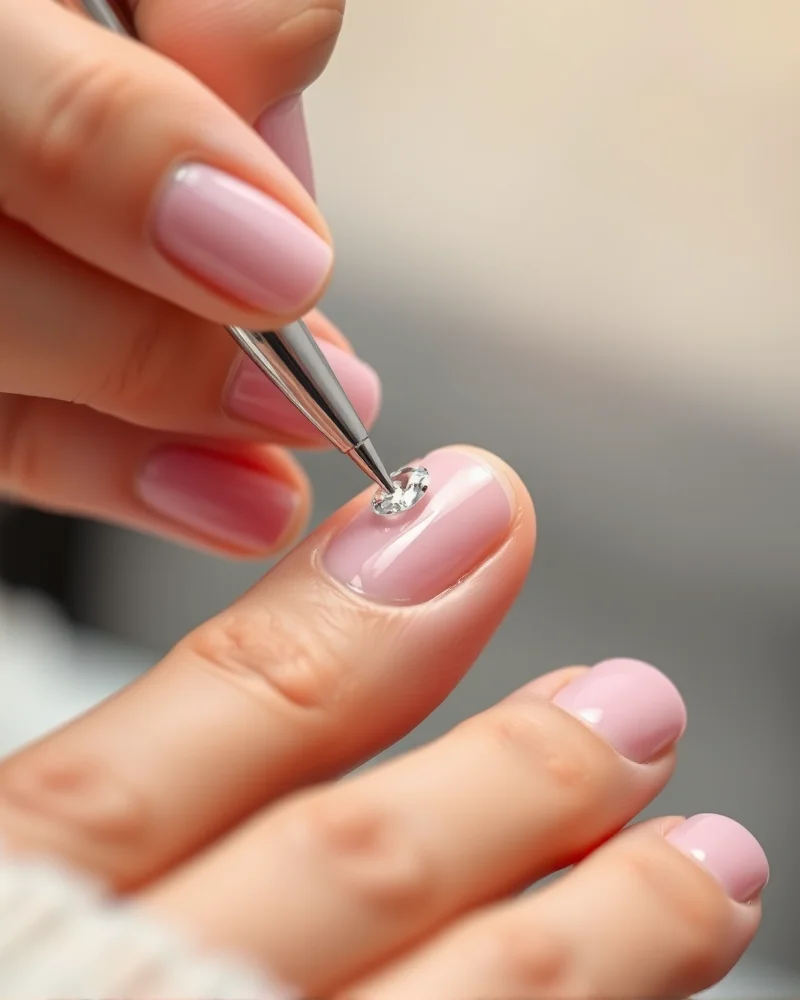
Achieving a salon quality finish where your crystals remain firmly attached for weeks requires a disciplined approach to chemical adhesion and physical placement. The longevity of your bedazzled manicure begins long before you touch a rhinestone. Start with meticulous nail prep by buffing the natural nail plate or the cured gel color surface to create a microscopic texture that improves mechanical grip. Cleanse the area thoroughly with ninety nine percent isopropyl alcohol to remove all traces of dust and natural oils which are the primary enemies of long term crystal wear.
For the adhesive layer, avoid standard top coats which are too thin to support the weight of heavy stones. Instead, select a dedicated rhinestone glue or a high viscosity builder gel. Apply a small bead of this adhesive to the exact spot where the gem will sit. If you are applying larger crystals, use a sturdy base gel and ensure the placement strategy involves nesting the crystal into the wet product so the gel rises slightly around the base of the stone. This creates a secure foundation that acts as a structural collar for the gem.
Precision is vital during the placement phase. Using high quality wax tipped pickup tools allows you to maneuver crystals without dragging or smudging your base layer. Once the crystals are arranged, cure the gel adhesive completely according to the manufacturer instructions. The final and most critical step is the sealing process. Use a thin detail brush to apply a non wipe top coat carefully around the perimeter of the crystal base. Do not paint over the top of the crystal surface, as this will dull the facets and ruin the brilliant light reflection that makes the manicure pop. By sealing only the base where the stone meets the nail, you create a waterproof barrier that protects your design against daily wear and tear while maintaining the sparkling clarity of every individual rhinestone.
Which bedazzling styles are currently trending?
The current landscape of nail artistry is a vibrant intersection of nostalgia and futuristic precision. When it comes to bedazzling, the trends have shifted away from uniform coverage toward intentional placements that tell a specific visual story. If you are looking to elevate your next manicure, understanding these aesthetic pillars is key to achieving a high end look that feels relevant to the modern zeitgeist.
First, we see a powerful resurgence of Clean Girl minimalism. This aesthetic focuses on the ‘less is more’ philosophy, where a single, strategically placed Swarovski crystal at the base of the cuticle transforms a bare or sheer nude nail into an understated statement. It is perfect for those who want a touch of sophistication without overwhelming their natural nail shape. For a more expansive take on your personal environment, you might consider how these clean, curated aesthetics translate to your home decor ideas to ensure your style remains cohesive from your beauty routine to your interior design choices.
On the opposite end of the spectrum, Y2K maximalism continues to dominate social feeds. This style thrives on chaos and color, utilizing clusters of rhinestones, butterfly charms, and iridescent cabochons to create a nostalgic, playful vibe. To master this, avoid symmetry; instead, scatter different sizes of gems across the nail bed to mimic the joyful, unpolished energy of the early 2000s. We are also seeing a sophisticated evolution of this trend through 3D chrome and crystal combinations. By layering liquid metal chrome powders with raised, multi faceted crystals, nail technicians create a sculptural effect that catches the light from every possible angle. This mixture of cold, metallic finishes and brilliant, icy crystals adds significant texture to the nail surface.
Finally, celestial motifs have emerged as a permanent staple. Think silver star charms, moon shaped studs, and constellations mapped out with tiny micro crystals against deep navy or velvet matte backgrounds. These designs provide a cosmic elegance that works beautifully for formal occasions or everyday wear. Whether you choose the restraint of a single gem or the intricate layering of 3D metallic art, the key is to prioritize high quality adhesives that protect the integrity of your nail bed while allowing your artistic vision to shine.
Is there a difference between flat-back and pointed-back crystals?
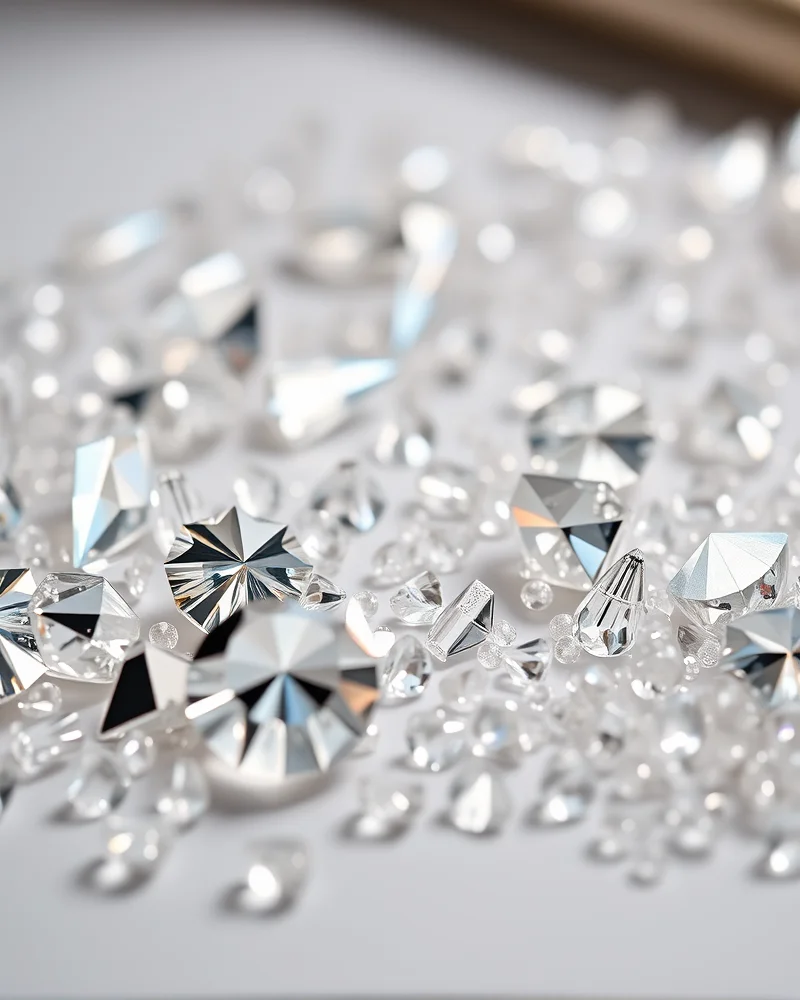
When you start your journey into the world of professional nail art, one of the most critical decisions you will make involves the geometry of your embellishments. Understanding the mechanical difference between flat back crystals and pointed back crystals is essential for achieving a high end, durable finish. Choosing the wrong type for your design can lead to premature lifting or a lack of structural integrity. To help you master these components, we have categorized the primary differences in the table below.
| Feature | Flat Back Crystals | Pointed Back Crystals (Chatons) |
|---|---|---|
| Primary Use | Surface embellishment on flat nail beds | High impact 3D structural designs |
| Attachment Method | Adhesive or gel overlay base | Must be embedded in acrylic or thick bead gel |
| Profile Height | Low profile, minimal snagging | High profile, dramatic projection |
| Light Refraction | Standard surface brilliance | Superior brilliance via conical base |
Flat back crystals represent the industry standard for most luxury manicures. Because they possess a completely flat underside, they provide maximum surface contact with the nail plate. This allows the adhesive or structure gel to create a firm bond, making them ideal for elaborate patterns, intricate borders, or full coverage pavé designs. Since they hug the curve of the natural nail or artificial enhancement, they are much less likely to snag on clothing or hair.
On the other hand, pointed back crystals, also known as chatons, are the secret weapon of editorial nail artists. These stones are faceted into a cone shape, which is specifically engineered to reflect light back through the top of the crystal, resulting in an unmatched sparkle. Because of their pointed base, they cannot be glued directly to the surface of a nail. Instead, you must build a small cradle of acrylic or thick viscosity builder gel to seat the stone. This technique provides a secure foundation for the point, ensuring the stone remains stable despite its dramatic height. Pro tip: when working with large chatons, always frame them with smaller micro beads to hide the base and create a cohesive, jewelry inspired aesthetic that looks as though it were crafted by a professional jeweler.
What is the best way to design a bedazzled bridal manicure?
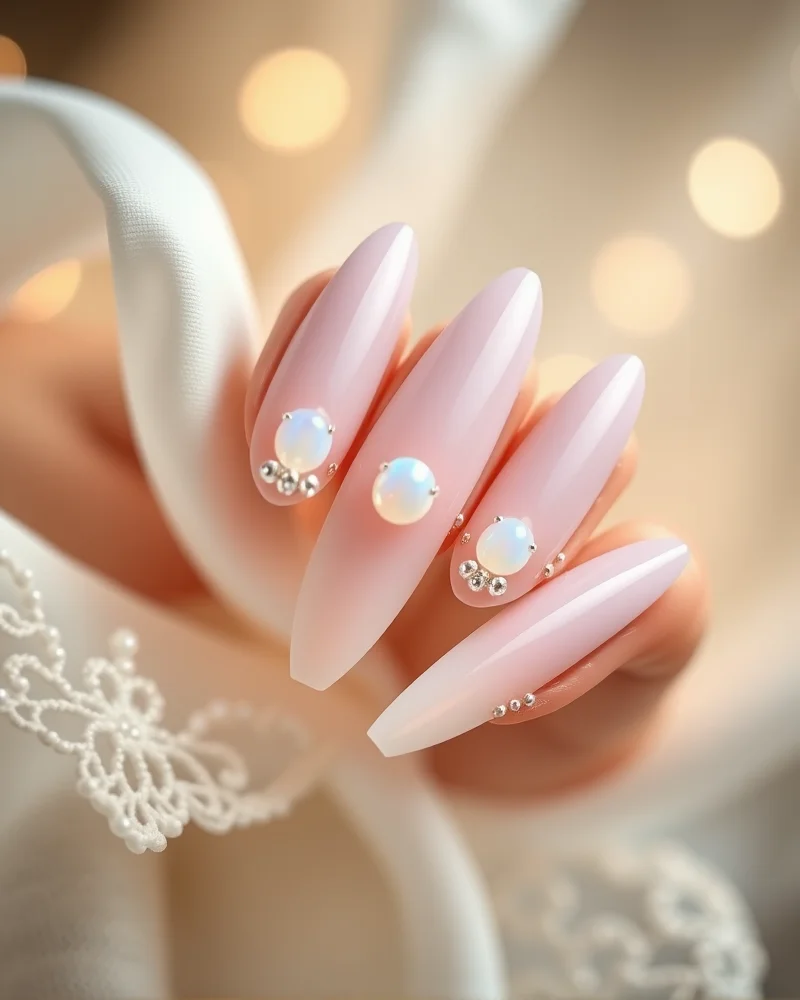
Designing the ultimate bridal manicure requires a delicate balance between high fashion and timeless elegance. When opting for a bedazzled aesthetic, the key to achieving a sophisticated look lies in the curation of a monochromatic palette. For a luxury bridal finish, focus your design strategy on sheer pinks, creamy nudes, and crisp, clean whites. These hues provide the perfect backdrop for light reflecting embellishments without overwhelming the refined nature of your wedding day ensemble. To elevate the manicure, consider using high quality materials such as genuine pearls and white opals, which offer a soft, iridescent glow that mimics the traditional jewelry worn by brides.
Integrating these elements requires a strategic placement approach. Instead of covering the entire nail bed, use silver accents to frame the cuticle area or create delicate linear patterns that elongate the fingers. Pearls should be used sparingly, perhaps as a single focal point on the ring finger, to maintain a minimalist yet opulent vibe. White opals, on the other hand, provide a multifaceted sparkle that shifts colors subtly as you move your hands, creating a sense of depth that plain crystals simply cannot replicate. To ensure the design remains cohesive, stick to a single color temperature for your silver elements, ensuring they complement the cool undertones of your sheer base coat.
Consider these professional tips for a polished result:
- Select different sizes of flat back crystals to create a textured, organic look that prevents the manicure from appearing too rigid.
- Apply a high gloss, non yellowing top coat around the base of your embellishments to seal them firmly without dulling their shine.
- Pair a sheer pink base with milky white opals to create a soft, ethereal glow that is perfect for professional wedding photography.
- Opt for silver caviar beads to fill in gaps between larger crystals, which adds a high end, jewelry inspired texture to your nail art.
By blending these luxurious materials with a clean, light color palette, you create a manicure that feels both modern and eternally classic. This approach ensures your hands look impeccable from the altar to the reception, providing a stunning visual detail that perfectly complements your bridal style.
How can you mix textures and charms for a unique look?
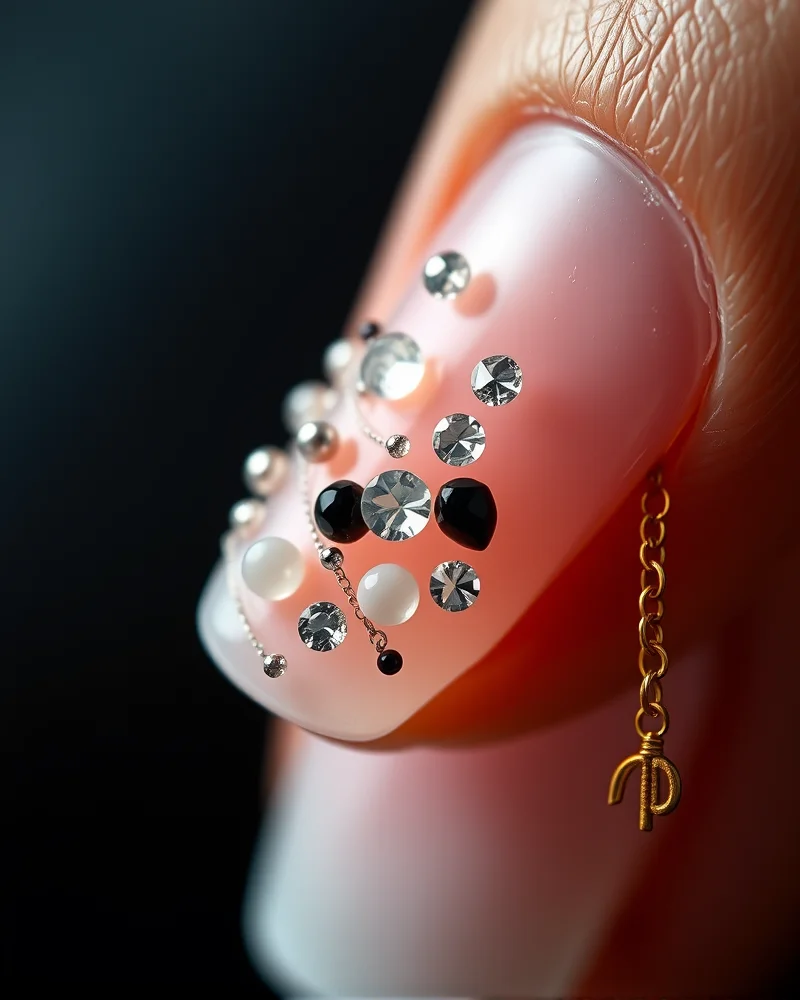
True nail artistry goes beyond simple sparkle. To elevate your manicure from standard to runway ready, you must master the art of tactile contrast. Combining high shine crystals with industrial or organic elements creates a multidimensional aesthetic that draws the eye and makes your hands the center of every conversation. By layering different materials, you transform a flat nail surface into a sculptural masterpiece that feels as good as it looks.
Here are several expert strategies to combine metal studs, caviar beads, delicate chains, and traditional crystals for maximum visual impact:
- Mastering the Metallic Mix: Start by pairing gold or silver micro-studs with classic Swarovski or Czech crystals. The key here is balance. If your crystals provide the light refraction, use metal studs to provide a grounded, architectural frame. Place smaller studs along the cuticle line or surround a larger statement stone with a halo of tiny metal spheres to create a sophisticated, jewelry-inspired finish.
- The Texture of Caviar Beads: Caviar beads offer a granulated, matte finish that provides a stunning counterpoint to the smooth facets of luxury crystals. For a runway-ready look, try a fall chalkboard aesthetic by pairing deep, moody base colors with a cluster of black caviar beads and iridescent crystals. The tiny beads create a textured relief that makes the shiny stones appear even brighter by comparison.
- Chains as Structural Elements: Incorporate ultra-thin jewelry chains into your design by draping them across the nail bed. Secure them at the cuticle and the free edge using a high-viscosity builder gel. You can anchor these chains with a single, larger crystal charm at the center. This creates a dangling, movement-heavy effect that mimics high-end charm bracelets.
- Creating Focal Points with Charms: For a bold statement, reserve your largest charms for the ring finger. Surround these heavy elements with smaller, flat-back crystals to taper the transition from the nail surface to the charm. This layering prevents the design from looking messy while ensuring that the transition between the flat nail and the 3D charm is seamless and professional.
- Pro-Tip for Longevity: When mixing diverse materials, remember that your adhesion technique is everything. Always use a thick, non-wipe gem adhesive for your heavy charms and chains, and encapsulate the edges of your smaller beads with a tiny amount of top coat to ensure they do not snag on clothing.
By blending the cold, industrial feel of metal with the liquid shimmer of crystals, you create a complex interplay of light and shadow. Experimenting with these varying textures allows you to express your individual style through a complex, multi-layered wearable art form that stands out in any setting.
How do you achieve a ‘Full Bling’ look without it looking messy?
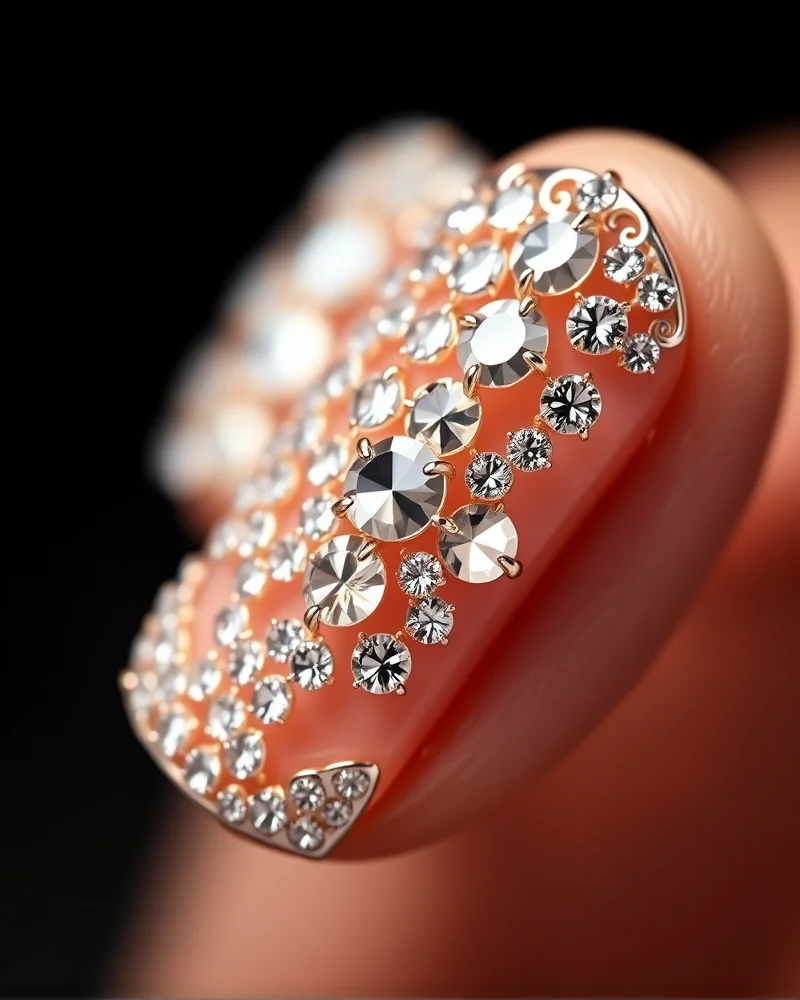
Achieving a full bling manicure that commands attention without descending into visual chaos is the ultimate mark of a professional nail artist. The difference between a cohesive, luxurious set and one that looks cluttered lies in the architecture of your design. When you are covering the entire nail plate with rhinestones, precision is your greatest asset. The first rule to mastering this aesthetic is the implementation of a rigid mapping strategy. Before placing a single crystal, visualize your grid. You must begin by establishing a central vertical axis on the nail. By placing your largest focal crystals along this midline first, you create a structural anchor that guides the eye. Once the spine of your design is set, you can work outward toward the sidewalls, ensuring that the spacing remains uniform across the entire surface.
Symmetry acts as the stabilizer for high-density embellishments. If your placement feels organic or random, the nail will appear messy because the brain struggles to process the lack of pattern. To avoid this, focus on consistent orientation. If you are using pointed back crystals, ensure every facet is aligned in the same direction to maximize light reflection. Furthermore, do not overlook the importance of negative space. Even in a full bling application, allowing small gaps for tiny micro beads or clear caviar beads creates a sense of airiness that prevents the manicure from looking like a heavy, singular block of resin. If you choose not to use micro beads, consider a consistent color story. A monochromatic palette using varied crystal sizes is far more sophisticated than a multi colored approach, as it creates texture through dimension rather than conflicting hues.
To maintain a clean finish, consider these essential techniques:
- Use a specialized wax-tipped pick-up tool: This prevents sticky residue from blurring the facets of your crystals, keeping the refraction clear.
- Adopt a layered curing process: Apply your crystals in sections and flash cure as you go to prevent migration, which is the primary cause of crooked, messy looking lines.
- Strategic sizing: Always reserve your smallest stones for the cuticle area and the sidewalls. This creates a tapered, slim look that makes the nail appear refined rather than bulky or overgrown.
By blending the rigor of geometric mapping with a disciplined color palette, you ensure that your full bling set looks like a deliberate piece of jewelry rather than an accidental heap of sparkle.
What are the common mistakes to avoid during crystal application?
- Q: Why does my crystal top coat application result in a dull or cloudy appearance?
- A: The most frequent culprit behind lackluster crystals is improper top coat application. Many beginners mistakenly brush top coat directly over the entire surface of the crystal. This fills the facets with liquid, effectively burying the light refraction that gives a stone its sparkle. To avoid this, use a precision liner brush to apply your top coat only around the base of the crystal. This seals the perimeter without ever touching the crown of the gem. If you accidentally get top coat on the stone, use a lint free wipe soaked in a small amount of pure acetone to clean the facets immediately before curing.
- Q: How do I select the right adhesive to prevent stones from popping off?
- A: Using the wrong adhesive is the fastest way to lose your hard work. Regular nail glue is often too brittle, which causes stones to snap off when the nail flexes. For professional results, always opt for a thick viscosity jewelry gel or a dedicated rhinestone adhesive. These products remain slightly flexible once cured, allowing them to absorb shock without losing their grip. If you are working with larger flat back crystals, consider using a combination of a base gel for structural support and a tiny bead of hard builder gel to encapsulate the edges.
- Q: Is nail surface preparation actually responsible for rhinestone longevity?
- A: Absolutely. If the foundation of your manicure is not properly prepped, your gems will fail regardless of how strong your adhesive is. Oil or dust residue left on the nail plate acts as a barrier that prevents a secure bond. You must perform a thorough dry manicure to remove all non living tissue, followed by a light buffing of the nail plate to create texture. Finally, cleanse the surface with high percentage isopropyl alcohol or a dehydrator before applying any base products. This simple step ensures that the nail bed is a pristine canvas for your bedazzled design.
- Q: Why do some gems lose their luster after only a few days?
- A: Quality matters significantly in the world of nail art. Low quality plastic or acrylic gems are porous and susceptible to discoloration from hairsprays, lotions, and sun exposure. These materials quickly scratch and lose their coating, leading to a flat, muddy appearance. For the premium look Nailosmetic is known for, always use high quality glass or lead free crystal rhinestones. These materials are engineered to maintain their brilliance and refractive index over time, ensuring your manicure stays as vibrant on day fourteen as it was on day one.
How should you remove bedazzled nails safely?
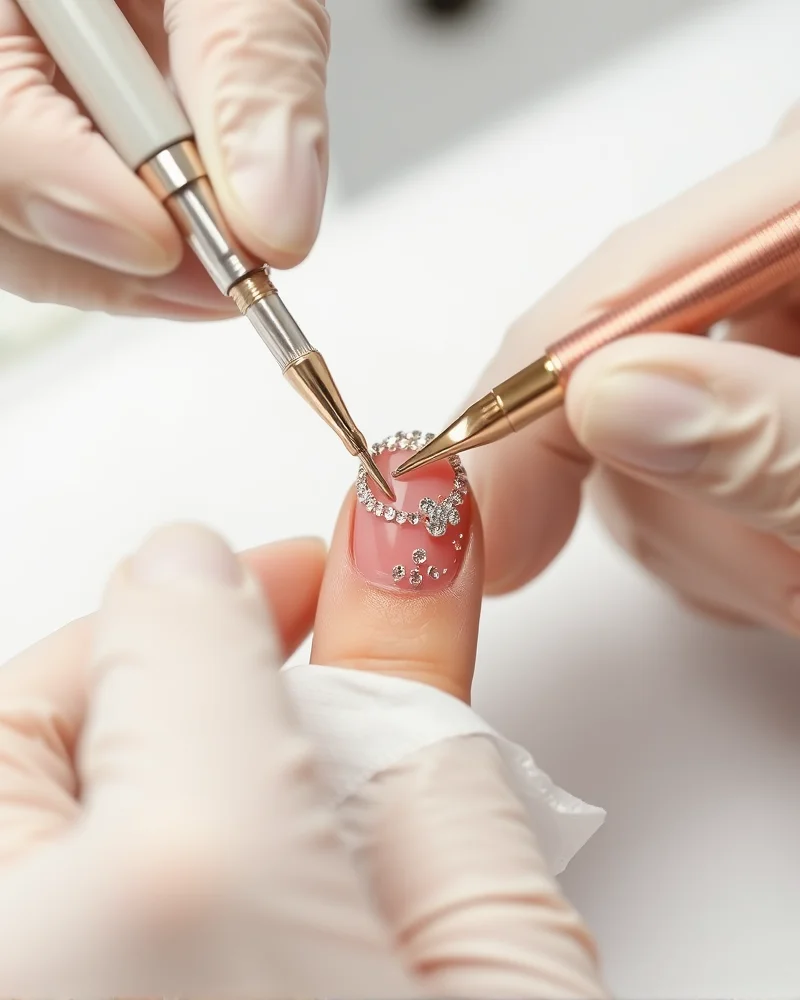
When the time comes to transition away from your high-shine, crystal-laden manicure, the removal process is just as critical as the initial application. Many enthusiasts treat their nails as mere substrates, but when dealing with heavy-duty builder gels and industrial-strength adhesives used to anchor large stones, improper removal can lead to catastrophic damage to your natural nail plate. The cardinal rule of professional nail care is patience. You must never attempt to rip or peel away bedazzled enhancements, as this action often takes layers of your natural keratin with it, leading to thinning, peeling, and painful nail bed sensitivity.
The most effective strategy for safe removal begins with thorough soaking. You should utilize a high-quality, professional-grade acetone to break down the integrity of the builder gel. Start by filing down the bulk of the product and the larger charms using a coarse-grit e-file bit, taking care to stop before you reach the natural nail surface. Once the bulk is reduced, wrap each finger in cotton pads soaked in acetone, secured tightly with foil to prevent evaporation. This allows the solvent to permeate the hardened resin. While waiting for the gel to soften, you might find yourself in a creative mood; perhaps consider browsing our curated seasonal interior design tips to spark inspiration for your next nail aesthetic while your hands are tucked away in foil.
After approximately fifteen to twenty minutes of soaking, the builder gel should take on a gelatinous, malleable consistency. At this stage, use a stainless steel cuticle pusher or an orangewood stick to gently pry the softened product away from the nail plate. If you feel any resistance, stop immediately and return to the soaking process. Never force the crystals or the hardened gel off the nail, as the leverage can cause microscopic fissures in your natural nails. By maintaining a gentle, lifting motion rather than a scraping one, you preserve the structural integrity of your nails, ensuring they remain strong and healthy for your next elaborate design. Prioritize the health of your nail matrix by finishing with a nourishing cuticle oil treatment, which helps restore moisture lost during the heavy acetone exposure.
What is the future of crystal nail art?
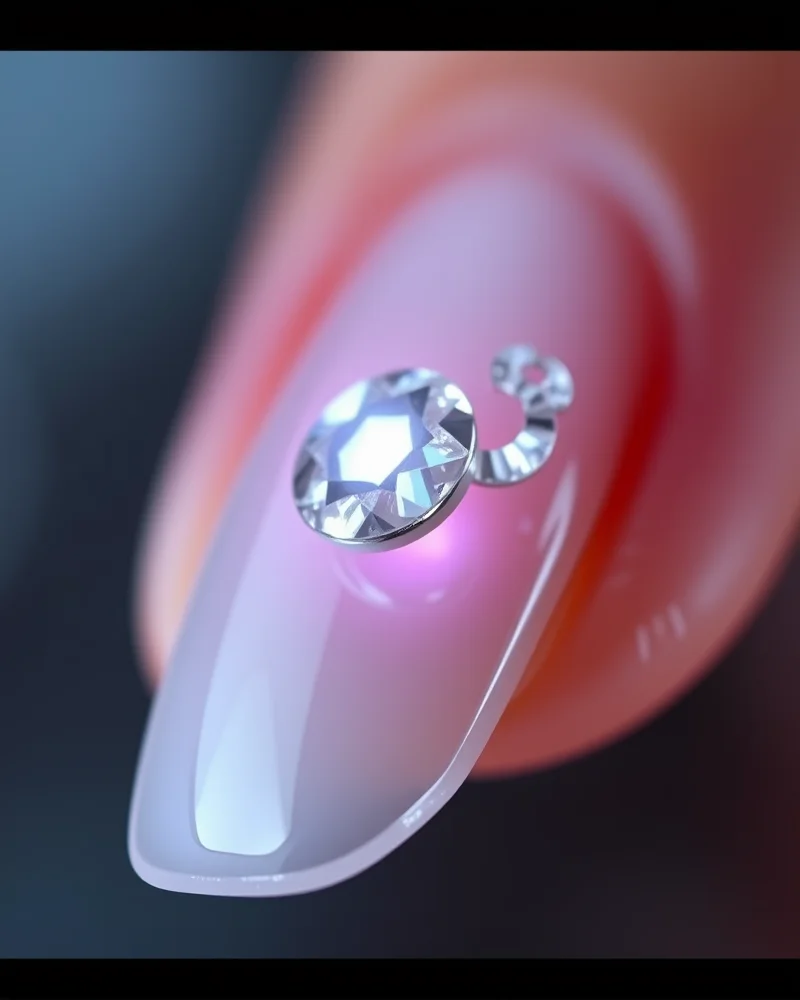
The future of crystal nail art is shifting away from traditional acrylic stones toward a more sophisticated fusion of sustainability, high refractive performance, and wearable technology. As the beauty industry pivots toward eco-conscious practices, we are seeing a massive transition from standard plastic resins to lead-free crystal glass. These new, high refractive index options offer superior light dispersion and clarity, mimicking the brilliance of genuine diamonds while remaining environmentally friendly. Professional nail technicians are increasingly prioritizing these premium glass options because they maintain their sparkle through daily wear and exposure to oils or lotions, unlike their plastic counterparts which tend to cloud and scratch over time.
Sustainability is no longer a niche preference but a core standard for high-end nail salons. We are currently observing a trend where brands are focusing on biodegradable alternatives and reusable charms. Instead of discarding intricate crystal designs with every nail change, the next generation of nail art involves magnetized charm bases or removable hardware that can be sanitized and reapplied to future sets. This reduces waste significantly and allows clients to invest in higher-quality, heirloom-style embellishments that last for years rather than weeks.
Perhaps the most exciting frontier in nail enhancement is the integration of smart technology. We are entering an era where small LED embedded charms and micro-circuitry become part of the standard manicure toolkit. Imagine tiny, fiber optic crystals that illuminate when near a smartphone or respond to movement through integrated motion-activated light sensors. These tech-forward charms are designed to be low-profile to ensure they do not catch on clothing, yet they provide an interactive, futuristic aesthetic that pushes the boundaries of traditional nail design.
To prepare for these advancements, we recommend that nail artists begin experimenting with modular application techniques. Start by practicing the placement of conductive base layers that can support low-voltage LED charms without compromising the structural integrity of the gel foundation. As these high-tech components become more accessible, the ability to blend classic artistry with modern electronics will define the next tier of luxury in the nail care industry. By embracing these advancements now, you position your brand at the forefront of a movement that values innovation as much as it values aesthetic perfection.
Mastering bedazzled nail art is as much about engineering as it is about aesthetics. By choosing the right adhesives, understanding your crystal types, and committing to proper application techniques, you can transform a standard manicure into a wearable masterpiece. Explore our range of professional tools at Nailosmetic to elevate your craft.