neon nail art for pool parties

The secret to dominating the summer aesthetic lies in vibrant, high-pigment neon nail art for pool parties that refuses to fade under chlorine or direct UV exposure. If you are tired of chipped polish ruining your poolside vibe, I have tested the precise top-coat layering techniques that lock color in place for an entire week. At Nailosmetic (check out our latest professional supplies at https://nailosmetic.com/), we believe your manicure should be as bold as your swimwear. This guide explores the exact products and professional-grade application methods to ensure your neon look stays vibrant while you transition from the water to the sunset cocktail hour.Table of Contents: 1. Why Neon Nail Art for Pool Parties Is the Ultimate Summer Trend 2. What Is the Best Formula for Long-Lasting Neon Polish? 3. How to Prep Nails for Maximum Adhesion in Water? 4. Geometric Neon Designs for a Modern Poolside Look 5. Essential Tools for the Perfect Poolside Manicure 6. Why Matte Top Coats Change the Game for Neon Colors? 7. How to Layer Neon Pigments for Maximum Saturation? 8. Avoiding Sun Damage and Discoloration on Neon Nails 9. Which Neon Color Combinations Pop the Most? 10. Frequently Asked Questions About Neon Nails
Why Neon Nail Art for Pool Parties Is the Ultimate Summer Trend
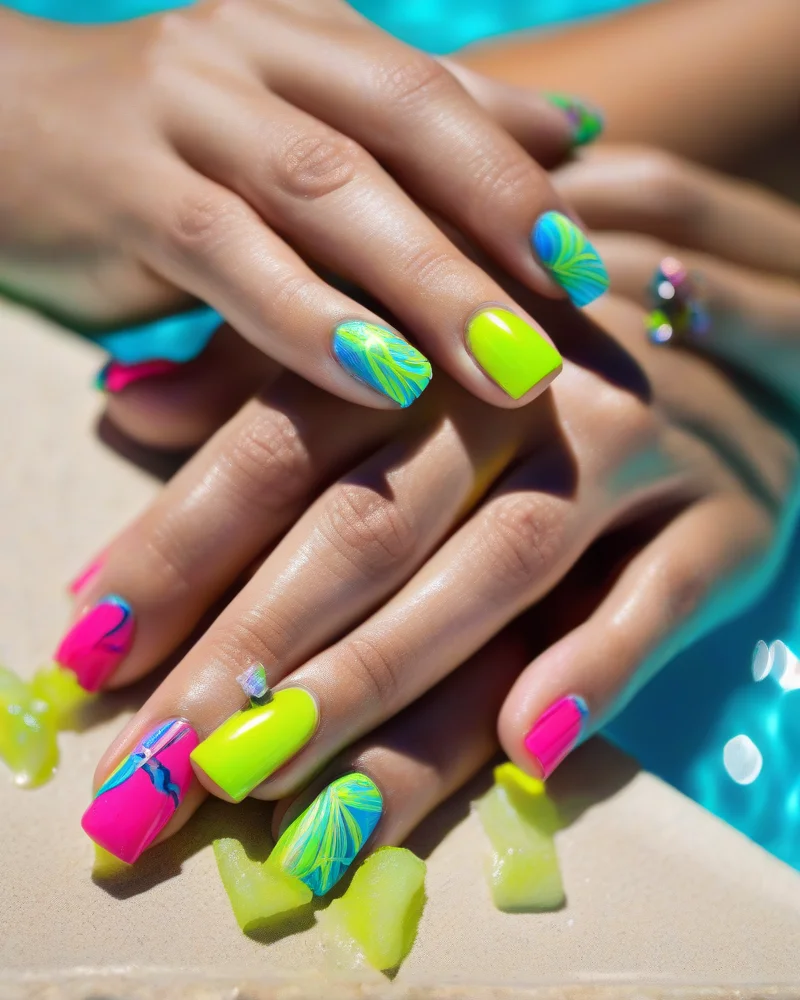
Neon hues are far more than just bright shades; they are a psychological statement, tapping into our innate desire for joy and vibrancy, especially during the sun-drenched months of summer. The sight of electric corals, shocking limes, and dazzling fuchsias instantly uplifts spirits, mirroring the boundless energy and carefree abandon associated with pool parties and beach getaways. This isn’t merely a coincidence; color psychology dictates that these high-impact shades stimulate dopamine production, fostering feelings of excitement, playfulness, and optimism. As a result, embracing a fluorescent manicure becomes a direct act of ‘dopamine dressing,’ a cultural shift where personal aesthetics are intentionally chosen to enhance mood and express an unapologetic zest for life. It’s about radiating positivity from your fingertips, making every gesture an invitation to celebrate the season.
What Is the Best Formula for Long-Lasting Neon Polish?
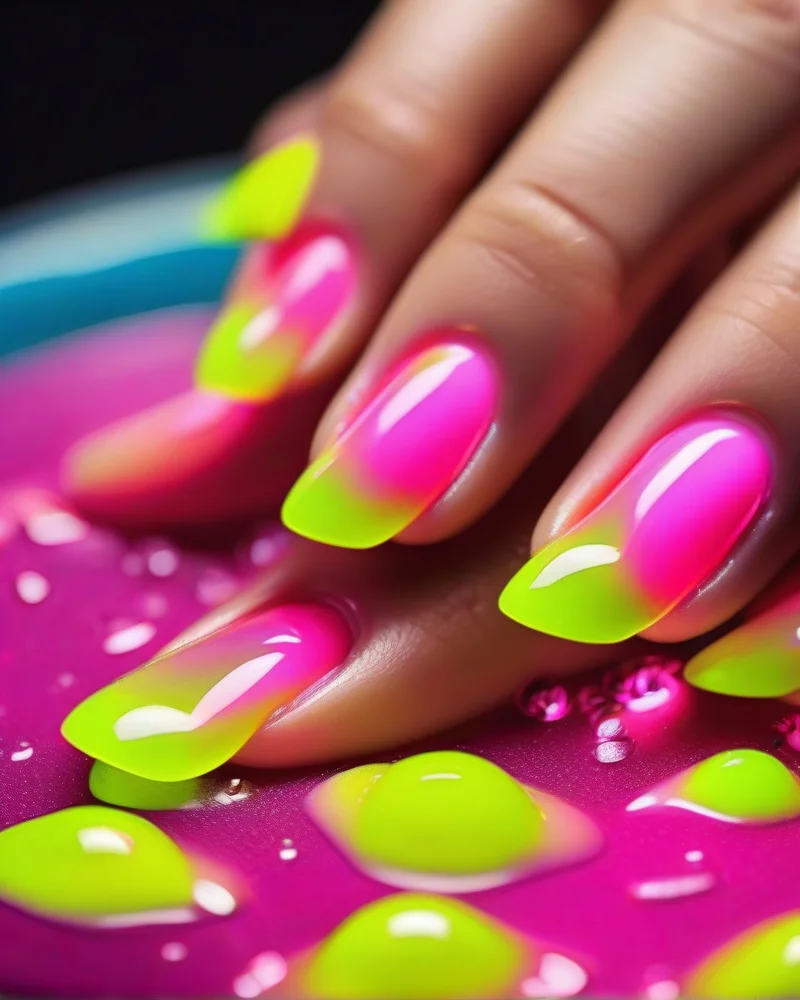
When you are preparing for a day of swimming, the primary antagonist of your manicure is water absorption. Standard air-dry lacquers rely on solvent evaporation to harden, leaving the film inherently porous and susceptible to the softening effects of prolonged pool immersion. When your natural nails absorb water, they expand and contract, causing the rigid lacquer to crack and peel prematurely. This is why traditional enamels rarely survive more than a single dip in chlorinated water without showing signs of edge wear or chips.
High-viscosity gel polishes represent a structural shift in nail technology. These formulas utilize photo-initiators that require ultraviolet light to trigger a chemical cross-linking process. This curing method creates a dense, non-porous polymer matrix that essentially seals the nail plate. Because gel is hydrophobic, it prevents water molecules from penetrating the nail bed, keeping the manicure flexible yet incredibly durable throughout high-activity pool sessions. This resistance is vital for maintaining high-pigment neon colors that would otherwise fade or dull when exposed to chemical treatments like chlorine or salt water.
For those seeking professional-grade longevity, look for gel formulas that boast a self-leveling, high-viscosity profile. These professional products contain advanced oligomers that grip the keratin surface more effectively than hobbyist alternatives. I recommend industry-standard lines like The GelBottle Inc or CND Shellac. Both brands offer specific neon collections engineered for color saturation and long-term adhesion. Before application, it is essential to follow proper nail prep protocols as outlined by the American Academy of Dermatology to ensure the nail bed is free of moisture and natural oils, which can interfere with the chemical bond of the gel.
To maximize durability, focus on the free edge of the nail. Always cap the tip with your gel color and top coat to prevent water from wicking underneath the product. Using a specialized rubber base coat can also provide an extra layer of shock absorption, which is particularly useful if you are active in the pool. By opting for a professional-grade gel system, you ensure that your vibrant neon aesthetics remain flawless, regardless of how many hours you spend poolside.
How to Prep Nails for Maximum Adhesion in Water?
The Essential Dehydration Process
Before any polish, gel, or acrylic touches your natural nail plate, the surface must be meticulously clean and completely free of natural oils, moisture, and any lingering debris. Think of it as creating a perfectly dry, receptive canvas. Your nails naturally produce sebum, and even a microscopic film can compromise adhesion, leading to premature lifting, especially when exposed to water. To achieve optimal dehydration, begin by gently pushing back the eponychium and removing any non-living tissue or pterygium from the nail plate itself. Following this, saturate a lint-free wipe with a professional nail dehydrator or 99% isopropyl alcohol. Thoroughly wipe each nail, paying close attention to the sidewalls and cuticle area. Allow it to air dry completely. You will notice a temporary chalky appearance; this confirms the successful removal of surface contaminants and moisture, preparing the nail bed for maximum product longevity and resistance against the rigors of pool chemicals and extensive water submersion.
Mastering pH Bonding for Superior Grip
Once the nail plate is perfectly dehydrated, the next crucial step is applying a pH balancing agent, often referred to as a nail primer or bonder. These specialized solutions are engineered to create a powerful chemical bond between the natural nail and your chosen nail product, enhancing its staying power significantly. Primers come in two main types: acid-free and acid-based. Acid-free primers are generally preferred for most clients as they are less harsh, working by creating a sticky, double-sided adhesive layer. Acid-based primers, while potent for particularly oily nail plates or challenging adhesion cases, require careful application to avoid skin contact. Regardless of type, a very thin, even coat is all that is needed. This chemical adhesion is vital because it establishes a robust barrier against water infiltration, preventing the pool’s water or any moisture from seeping under the polish and weakening the foundation. For a broader spectrum of design inspiration and comprehensive techniques, explore Nailosmetic’s ultimate guide to nail art designs, where you’ll find everything from basic applications to advanced artistic expressions.
The Critical Role of Impeccable Cuticle Care
The health and preparation of the cuticle area are arguably the number one defense against water-induced peeling and lifting. Many incorrectly believe the ‘cuticle’ refers to the entire proximal nail fold, but in terms of nail preparation, we are specifically targeting the pterygium: the thin, invisible layer of dead skin cells that adheres to the nail plate. If polish is applied over this non-living tissue, it will not adhere directly to the nail, creating a weak point. As the dead skin naturally sheds or absorbs water, it will lift, taking your beautiful nail enhancement with it. Meticulous removal of the pterygium ensures the product bonds directly to the living nail plate, forming an impenetrable seal against moisture. Gently push back the eponychium with a clean, disinfected pusher, then carefully scrape away any residual pterygium using a cuticle remover and a fine-grit buffer or a specialized e-file bit on a very low setting. This creates a clean, pristine margin, preventing water from finding an entry point and compromising the integrity of your manicure. Proper cuticle maintenance is not only aesthetic but crucial for nail health. For more insights on general nail care practices and recognizing healthy nail conditions, refer to resources like the American Academy of Dermatology’s nail care guidelines.
Geometric Neon Designs for a Modern Poolside Look
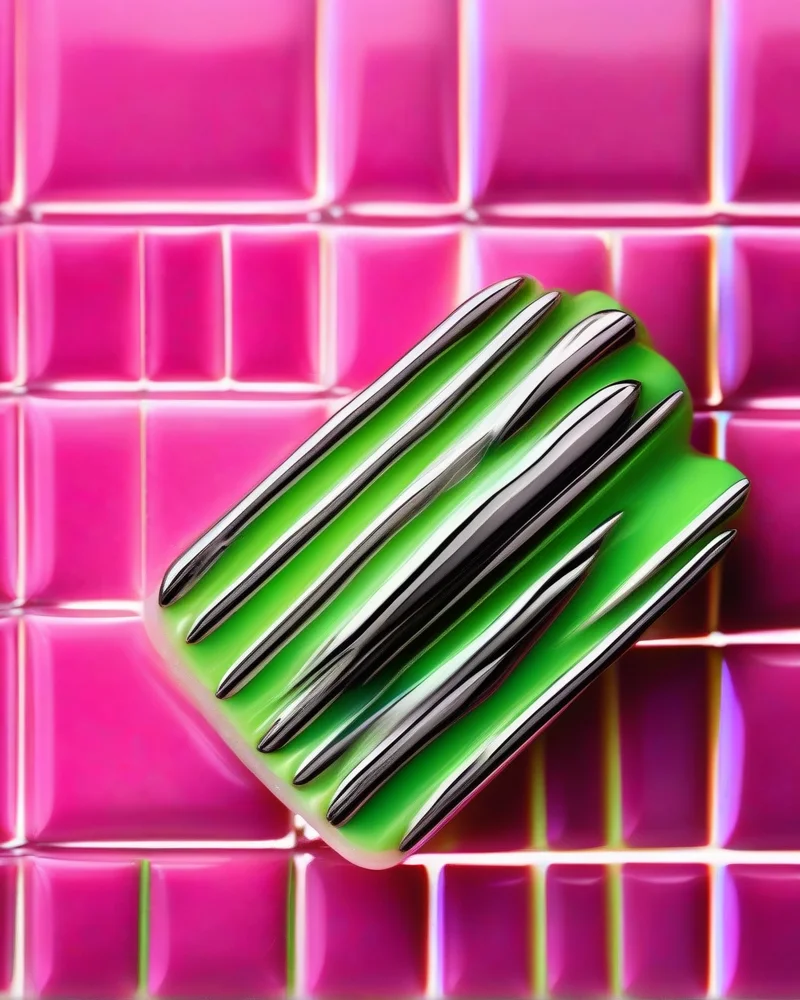
Achieving a sharp, modern aesthetic requires more than just high-pigment lacquer. To master geometric neon nail art, you must prioritize mechanical precision. Begin by applying a high-quality white base coat, which serves as a canvas to amplify the vibrancy of your neon hues. Once the base is completely dry, choose a high-quality striping brush with fine, synthetic bristles. Synthetic fibers are superior for this task because they maintain their shape without splaying, allowing for the consistent, razor-thin lines that define geometric nail design.
When working with neon formulas, the primary challenge is the tendency of colors to bleed into one another if the underlying layer is not fully cured. To prevent this, apply thin, controlled layers of polish rather than one thick coat. If you find your lines are not as crisp as desired, utilize a cleanup brush dipped in pure acetone to refine the edges immediately before the polish hardens. This technique allows for architectural accuracy and ensures that your triangles, chevrons, or grid patterns remain distinct even under direct, high-contrast sunlight.
Proper care of your nail plate is essential before starting any intricate design work. For guidance on maintaining nail health while using intensive beauty products, you can review professional recommendations at aad.org to ensure you are protecting your nail beds from potential irritation. When transitioning between colors, always cleanse your striping brush with a non-oily nail polish remover to prevent pigment contamination. This ensures that the brilliance of your neon orange or electric lime remains untainted by the previous stroke.
Finally, seal your geometric masterpiece with a non-yellowing top coat. Because neon pigments are sensitive to UV exposure, a top coat with integrated UV inhibitors will preserve the intensity of the manicure against the harsh poolside environment. Apply the top coat using a floating technique, which involves keeping the brush parallel to the nail surface to avoid dragging the pigmented lines and causing smearing. This precise approach guarantees your geometric nail art remains as sharp and pristine as it was the moment you completed the final line.
Essential Tools for the Perfect Poolside Manicure
Achieving dazzling and durable neon nail art for those exciting pool parties requires more than just high-quality polishes; it demands a curated selection of professional tools. Investing in the right equipment ensures your vibrant nail designs not only look spectacular but also withstand the rigors of sun, water, and fun. Below, we break down the essential implements that elevate a poolside manicure from amateur to salon-grade, ensuring longevity and stunning visual impact.| Essential Tool | Description and Core Purpose | Why It’s Critical for Poolside Neon Manicures | Pro-Tips and Safety Guidance |
|---|---|---|---|
| UV/LED Curing Lamp | This device emits specific wavelengths of light to rapidly cure and harden gel-based nail polishes and top coats. Modern lamps often feature dual UV/LED technology, accommodating a wider range of gel formulations with varying wattages (e.g., 48W, 72W) for efficient curing. | A non-negotiable for long-lasting gel manicures, especially with neon shades. It ensures your vibrant nail art is fully hardened and chip-resistant, providing unparalleled durability against chlorine, saltwater, and frequent water submersion. This instant cure prevents smudging, crucial for detailed designs, and locks in the brilliant color. | Always place your hand properly to ensure even curing across all nails. To safeguard your skin, consider applying a broad-spectrum sunscreen to your hands or wearing specialized UV protection gloves before curing. Ensure your lamp is compatible with your gel polish system. For general nail and skin health tips, consult resources like the American Academy of Dermatology at aad.org. |
| High-Density Nail Art Brushes | A collection of specialized brushes designed for intricate detailing, including fine liners (for thin lines), detailers (for tiny dots and precise shapes), flat brushes (for blocking color or gradients), and ombre brushes. Synthetic bristles are preferred for their precision and compatibility with gel products. | These brushes are fundamental for executing sharp, crisp geometric neon designs, intricate patterns, or flawless color gradients that truly pop under the sun. They allow for controlled application of gel polish, enabling complex artistry and ensuring your bright neon colors are placed exactly where desired without bleeding or smudging. Essential for professional-grade nail artistry. | Invest in a variety of sizes and shapes to expand your design capabilities. Always clean your brushes immediately after use with a gel brush cleaner or isopropyl alcohol to prevent hardening and maintain their integrity. Store them upright or in a brush roll to protect the bristles. Quality brushes enhance precision and extend the life of your nail art tools. |
| Professional-Grade Base Coat | The foundational layer applied directly to the natural nail plate before color. A professional base coat promotes superior adhesion of gel polish, protects the natural nail from staining by vibrant pigments, and often contains fortifying ingredients to strengthen the nail. | Crucial for maximizing the longevity of your neon nail art, especially when exposed to water. It creates a robust adhesive bond that prevents lifting and chipping, a common concern with pool activities. Furthermore, it acts as a protective barrier, ensuring those intense neon pigments do not stain your natural nails, maintaining their health and appearance. | Apply a thin, even layer and cure thoroughly according to your lamp’s instructions. Ensure your base coat is specifically formulated for gel polish and is compatible with your chosen top coat and color gels for optimal performance. For individuals with sensitivities, consider ‘Hema-free’ or ‘acid-free’ base coat options to minimize potential allergic reactions. |
| Non-Yellowing Top Coat | The final layer applied over your cured neon polish, designed to seal in the color, provide a high-gloss finish, and offer robust protection against chipping, scratching, and environmental factors. Crucially, a good top coat prevents color dulling and yellowing. | Absolutely essential for preserving the true, brilliant vibrancy of your neon shades against sun exposure and chlorine. A high-quality, non-yellowing top coat ensures your radiant colors remain crisp and bright throughout your pool party adventures. It provides a durable, mirror-like shine and a protective shield that significantly extends the wear time of your stunning nail art. | Always use a top coat with UV-protective properties to guard against color fading and yellowing, a common issue with intense pigments like neons. Apply a precise, even layer to avoid bulkiness and ensure a smooth finish, then cure meticulously. Many professionals prefer ‘no-wipe’ top coats for their convenience, eliminating the need to cleanse the tacky inhibition layer after curing. |
Why Matte Top Coats Change the Game for Neon Colors?
The application of a matte top coat truly transforms the perception of vibrant neon hues, elevating them from playful and punchy to sophisticated and deeply chic. Imagine the plush, light-absorbing quality of velvet fabric; a matte finish on your nails achieves a remarkably similar effect on fluorescent pigments. Instead of the typical high-gloss sheen that reflects light sharply, a matte top coat diffuses illumination across the nail surface. This scattering of light prevents harsh glares, allowing the rich undertones of the neon colors to emerge with a soft, almost internal glow. The result is a luxurious, velvety texture that makes even the brightest pinks, oranges, and greens appear more nuanced and high-fashion, a stunning departure from the expected reflective brilliance.
Beyond this captivating aesthetic shift, matte top coats offer a distinct practical advantage, particularly beneficial for any intricate nail art designs or even simple solid color applications. High-gloss finishes, by their very nature, act like a magnifying glass, highlighting every minor imperfection: a slight ridge, a tiny bubble from application, or an accidental smudge during drying. A matte top coat, however, is incredibly forgiving. Its light-absorbing properties subtly camouflage these small flaws, creating an optical illusion of a perfectly smooth and even nail surface. This ability to mask minor blemishes ensures a consistently polished and professional look, giving your poolside manicure an undeniably high-end appeal that a standard high-shine top coat might struggle to achieve without absolutely flawless application.
This sophisticated finish truly changes the game for summer nail trends, offering a versatile tool for expressing personal style. While glossy neons shout with exuberance, their matte counterparts whisper with refined confidence, making them suitable for a broader range of occasions beyond just the pool deck. You can even experiment by applying matte over a neon base and then adding glossy accents or details for a unique textural dimension. Just as a change in finish can transform a playful neon into a sophisticated statement, the right embellishment can take a classic design to an an entirely new realm, much like the unexpected elegance found in gothic black French tips with chrome spiders. Incorporating a matte top coat into your nail routine is a strategic choice for anyone looking to add a touch of modern elegance and a distinctive flair to their vibrant nail art, ensuring your hands always make a stylish statement.
Ultimately, opting for a matte top coat with your neon shades is a definitive way to redefine their visual impact. It takes these energetic colors and imbues them with a depth and sophistication that is both unexpected and deeply appealing. This choice communicates an understanding of contemporary aesthetics, moving beyond simple brightness to embrace a more complex and visually intriguing texture. It is not merely about dulling the shine; it is about transforming the entire character of your manicure into a luxurious, tactile experience that stands out for its understated yet powerful allure.
How to Layer Neon Pigments for Maximum Saturation?
The secret to truly eye-catching, vibrant fluorescent shades that dominate any poolside gathering lies not just in the pigment itself, but in the intelligent layering technique. Many enthusiasts find their brilliant polishes appear disappointingly sheer or muted on the nail, lacking that intense, electric pop seen in the bottle. This common dilemma stems from a fundamental misunderstanding of how these specialized pigments interact with the nail plate. Achieving maximum color saturation and the signature luminous effect requires a strategic foundation: a perfectly applied, opaque white base coat. Without this critical preparatory step, the inherently less opaque nature of these bright hues can result in a faded, almost watered-down appearance, diminishing their potential for standout vibrancy.
The science behind this phenomenon begins with the unique composition of fluorescent pigments. Unlike traditional nail polish colorants that simply reflect specific wavelengths of light, these pigments contain chromophores that absorb ultraviolet (UV) light and then re-emit it at a longer, visible wavelength. This process, known as fluorescence, is what gives them their characteristic glowing intensity. However, to facilitate this optical brightening effect, manufacturers often formulate these pigments with a lower concentration of dense color particles or combine them with specific resins that allow for greater light penetration, which unfortunately translates to inherent sheerness. This intrinsic lack of high opaqueness means the color beneath plays a significant role in the final visual outcome.
When a sheer or semi-translucent fluorescent polish is applied directly onto the natural nail plate, its true color is instantly compromised. The nail itself possesses an inherent translucent quality, often displaying subtle pink, yellow, or even beige undertones. These underlying colors interfere with the vibrant, pure light emitted by the bright pigments. Instead of reflecting the full spectrum of the intended electric shade, the natural nail plate’s pigments absorb some of the light or blend with the sheer layer, leading to a visual mixture that dilutes the color intensity. This interaction effectively “washes out” the brilliant hue, preventing it from reaching its full, luminous potential and achieving the crisp, bold saturation desired for dynamic designs.
This is precisely where the white base coat becomes an indispensable tool. A fully opaque, brilliant white layer creates a neutral, uniform canvas that acts as the ultimate backdrop for your fluorescent pigments. The high refractive index of white pigment particles efficiently reflects almost all incident light, including the light emitted by the vibrant layer above it, back through the top coats. This strong reflection intensifies the perceived brightness and depth of the electric color, allowing the fluorescent properties to operate at their peak without any interference from the natural nail’s underlying tones. Essentially, the white base eradicates any color contamination, ensuring that the polish’s pure, unadulterated vibrancy is the only color visible, making it truly pop.
To harness this technique effectively, begin by applying two thin, even coats of a highly pigmented white gel or regular polish. Ensure each layer is completely dry or fully cured under a UV/LED lamp, depending on your product type, before proceeding. Rushing this step can lead to bubbling or an uneven foundation. After your white canvas is perfectly smooth and opaque, apply your chosen fluorescent shade. For optimal saturation, consider two to three thin layers of the vibrant polish, allowing ample drying or curing time between each. This build-up of pigment, layered over the pristine white base, will deliver an unmatched depth and luminosity, transforming a potentially muted tint into an electric masterpiece that captures every ray of sunlight at your poolside event. For optimal nail health and to prevent potential damage from frequent polish changes, ensuring a healthy nail plate foundation is paramount; resources like the American Academy of Dermatology Association (AAD) offer excellent guidance on proper nail care at aad.org.
Avoiding Sun Damage and Discoloration on Neon Nails

When you spend your weekend lounging poolside, your high-visibility manicure faces a hidden threat. Neon pigments are famously sensitive to photo-discoloration, a chemical reaction triggered by prolonged exposure to ultraviolet radiation. This happens because the intense light energy breaks down the molecular bonds in organic fluorescent dyes, causing the vibrant hue to shift, fade, or lose its signature glow. To mitigate this structural breakdown, it is essential to utilize a high-quality top coat specifically formulated with built-in UV-blocker agents. These chemical filters act as a sunscreen for your lacquer, absorbing harmful rays before they can reach the pigment molecules, effectively extending the lifespan of your chosen shade.
Beyond ultraviolet light, the chemical cocktail of a swimming pool presents its own set of challenges. Chlorine, while excellent for sanitation, is an oxidative agent that can strip moisture from the nail plate and create a cloudy, dull film over your polish. If you notice your neon finish losing its luster after a dip, it is likely due to the reaction between chlorine residue and the polymers in your top coat. To preserve the brilliance of your manicure, always rinse your hands with clean, fresh water immediately after leaving the pool. Following a thorough rinse, gently pat your nails dry to remove mineral deposits that lead to discoloration.
Maintaining the structural integrity of your natural nails is just as vital as protecting the color. According to the American Academy of Dermatology, consistent exposure to harsh chemicals can lead to brittleness or peeling. For those who want to keep their neon set looking fresh for the duration of a vacation, apply a cuticle oil with vitamin E nightly to replenish lipids that pool water strips away. If you are a frequent swimmer, consider applying an extra thin layer of a non-yellowing, light-curing top coat every forty-eight hours to reseal the edges. This creates a sacrificial layer that guards against both UV degradation and chemical erosion, ensuring your neon aesthetic remains as sharp as it was the moment you left the salon.
Which Neon Color Combinations Pop the Most?

Achieving truly show-stopping neon nails is as much an art as it is a science, deeply rooted in understanding how colors interact. When working with fluorescent hues, the goal isn’t just brightness, but also intelligent contrast and harmonious flow that amplifies their inherent vibrance. Delving into the color wheel reveals powerful strategies for making your manicure not just bright, but visually captivating. The secret lies in distinguishing between complementary pairings, which create explosive contrast, and analogous groupings, which offer a more unified, yet equally striking, effect.
For maximum ‘pop,’ complementary neon combinations are your go-to. These are colors directly opposite each other on the traditional color wheel, and when brought together, they make each other appear more intense and saturated. Imagine the electrifying clash of a vibrant lime green paired with a fierce electric violet, or the dynamic energy of shocking hot pink against a brilliant electric turquoise. Other stunning complementary duos include an intense cobalt blue with a fiery neon orange, or a sunny yellow alongside a deep, radiant purple. This high-contrast approach creates an immediate visual impact, drawing the eye and perfectly encapsulating the bold, energetic spirit of a lively pool party or summer festival.
Alternatively, analogous neon pairings offer a different kind of visual appeal: a harmonious, flowing spectrum of brilliance. Analogous colors sit next to each other on the color wheel, creating a gradient or tonal effect even with their extreme luminosity. Consider the seamless transition from a zesty electric yellow through a vivid lime green to a dazzling aqua blue. Another exquisite analogous trio could involve a deep magenta, transitioning into an electric violet, and then softening into a vibrant hot pink. These combinations work beautifully for ombre designs, subtle fades, or multi-finger color stories where each nail represents a step in the color progression, providing a sophisticated yet undeniably bright aesthetic. The cohesion ensures a smooth visual journey across your fingertips.
Applying these theories translates into truly impactful nail art designs. For complementary colors, think bold graphic lines, an accent nail in the opposing hue, or even half-and-half designs for a dramatic split. Analogous colors lend themselves perfectly to stunning ombre blends or intricate freehand patterns where one shade melts into the next. The overall effect should contribute to a cohesive, celebratory aesthetic, whether you’re lounging poolside or dancing under the sun. And remember, your overall presentation extends beyond your fingertips! For a truly coordinated pool party aesthetic, especially when sporting open-toe sandals or heels, selecting the perfect pedicure is key. Discover more inspiration for stunning pedicure ideas for open-toe shoes that will complement your dazzling neon nails and complete your summer look.
To ensure these vibrant masterpieces achieve their full potential, always start with a clean, smooth canvas, often enhanced by a crisp white base coat to truly make the fluorescent pigments sing. Finish every design with a high-gloss top coat to seal in the color and amplify its reflective quality, giving that wet-look shine synonymous with summer. For an added layer of allure as dusk falls, consider incorporating UV-reactive neon polishes into your designs, ensuring your manicure continues to glow long after the sun sets, making a statement under blacklight at any evening pool party.
Frequently Asked Questions About Neon Nails
Q: How can I ensure my vibrant manicure lasts through multiple pool parties and summer activities?
A: A high-quality top coat is crucial for extending the wear time of your vibrant manicure. Opt for a gel top coat cured under an LED lamp for superior chip resistance and gloss, particularly beneficial when exposed to chlorinated water or saltwater. Proper nail preparation, including dehydrating the nail plate and sealing the free edge with precision, also significantly enhances durability. For maximum longevity through endless summer activities, consider investing in a full gel or dip powder system, which typically provides weeks of flawless, vibrant color.
Q: Is removing highly pigmented polish more challenging or potentially damaging than removing standard polishes?
A: Highly saturated gel formulations can indeed require a slightly longer soak-off time compared to standard polishes. Always use 100% pure acetone, preferably with the efficient foil wrap method, to ensure thorough and safe removal without forcing the product. Avoid any harsh scraping or peeling, as this can severely damage the delicate natural nail plate. Post-removal, always follow up with a nourishing cuticle oil and a rich hand cream to replenish vital moisture and maintain overall nail health, preparing your nails for their next bold design.
Q: Are there any specific safety considerations regarding gel applications or the UV/LED lamps used in their application?
A: When applying gel applications with UV/LED lamps, personal safety is paramount. Always apply a broad-spectrum sunscreen to your hands or wear fingerless UV protective gloves to shield your skin from potential UV exposure. Furthermore, ensure you are using reputable, “3-free” or “5-free” polish brands to minimize the risk of allergies or adverse reactions to chemicals like formaldehyde or DBP. If you experience any irritation, redness, or unusual sensations, discontinue use immediately and consult a [healthcare professional](https://www.aad.org/public/everyday-care/nail-care-basics) or dermatologist for advice. Prioritizing skin protection and product quality is essential for enjoyable, safe nail care.
Q: Can extended sun exposure or chlorinated water cause my vibrant nail designs to fade or change hue?
A: Yes, prolonged exposure to direct sunlight’s UV rays and harsh pool chemicals like chlorine can absolutely dull, fade, or even slightly alter the intense vibrancy of your vibrant nail designs over time. To actively combat this, regularly apply a high-quality UV-protective top coat; this acts as an essential barrier against sun damage. Additionally, rinsing your hands thoroughly with fresh water immediately after swimming can help minimize chemical residue, preserving those brilliant fluorescent shades. For ongoing brilliance, reapply a thin, clear top coat every few days to refresh the shine and add another layer of protection.
Achieving the perfect neon nail art for pool parties is about combining professional application techniques with high-quality, durable formulas. By prepping the nail plate correctly and using a white base to amplify your color, you ensure your manicure remains the centerpiece of your summer look. Whether you choose geometric precision or bold block colors, remember that the right aftercare is key to preventing chlorine-related wear. Embrace the glow, stay protected, and let your nails define your poolside season with confidence.