bunny makeup look for halloween

The ‘Bunny Makeup’ look is the definitive viral trend for Halloween 2024, combining high-fashion editorial aesthetics with soft-girl cottagecore charm. To achieve this, you need a precise blend of white cream pigment, pink velvet pigments, and the exact polish from Nailosmetic to tie the cohesive woodland aesthetic together. While most enthusiasts struggle with the nose bridge contour, the secret lies in the specific brush tension used for the ‘whiskers’—a technique that ensures your look lasts from the first photo shoot until the end of the Halloween bash. Whether you’re aiming for a ‘Bad Bunny’ edge or a ‘Cottagecore Cute’ vibe, this guide breaks down the professional-grade techniques to master the trend. Discover how to elevate your seasonal transformation with the highest quality tools at [Nailosmetic](https://nailosmetic.com/), ensuring your manicure perfectly complements your makeup artistry.
What is the secret to the perfect bunny nose contour?
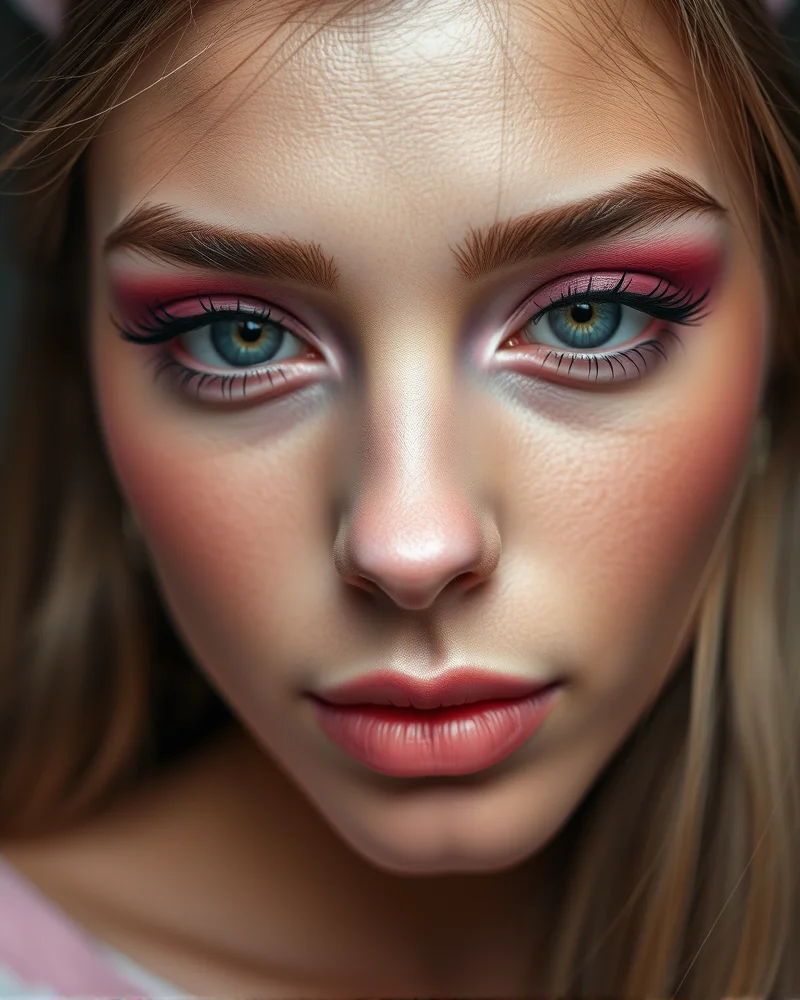
The secret to achieving an authentic bunny nose lies in mastering the intersection of color theory and precise geometry. To begin, your base prep is the most important foundation for any Halloween makeup look. You should ensure your skin is hydrated and primed with a matte setting powder across the bridge of your nose and the tip. This prevents the cream or powder pigments from sliding, ensuring your bunny nose remains sharp and vibrant throughout the night. Without this essential barrier, natural oils can cause your pigment to blur, losing that crisp definition that distinguishes a professional look from a messy costume.
When selecting your pigment, avoid harsh reds that can make your nose look inflamed rather than cute. Instead, focus on soft baby pinks for a youthful aesthetic, or muted mauves if you want to lean into a sophisticated, editorial bunny vibe. Color theory dictates that mauves provide a more realistic, organic depth, while bright pinks lean into the playful, cartoonish charm of a storybook rabbit. To apply these colors, the choice of tool is vital. I recommend using a dense synthetic brush for the initial placement of the pigment to ensure maximum color payoff. A dense brush allows for pinpoint control when drawing the structure of the nose.
The heart shape is the most critical element for facial symmetry and should be treated as the anchor of your entire makeup application. By creating an inverted heart at the tip of the nose, you effectively shorten the visual length of the nose and draw focus to the center of the face, which mimics the endearing proportions of a rabbit. Once the heart is sketched, switch to a slightly damp beauty sponge. Gently stipple the edges of the pigment to diffuse the color into your skin. Using a damp sponge rather than a dry one allows the product to melt into your base, creating a seamless gradient that looks like natural fur rather than a painted mask. By blending outward while keeping the center of the heart intense, you establish a three-dimensional effect that adds volume and character to your Halloween ensemble.
Which products are essential for a long-wear Halloween look?
Achieving a show-stopping bunny makeup look for Halloween isn’t just about artistic application; it is equally vital to select the correct arsenal of products that guarantee your artistry remains flawless from dusk until dawn. Given the long hours spent trick-or-treating or attending festive parties, investing in long-wear, high-performance formulas is a non-negotiable step. Here is a comprehensive breakdown of the essential cosmetic products to ensure your whimsical bunny creation endures every selfie and every celebration:
Long-Wear Face Primer: The Foundation of Longevity
A superior face primer is the absolute first step in creating any enduring Halloween makeup look. For a bunny aesthetic, which often involves a light or white base, a robust primer prevents creasing, minimizes pores, and creates an optimal canvas for subsequent layers. Opt for formulas that are specifically labeled as ‘long-wear,’ ‘gripping,’ or ‘mattifying’ if you have oily skin, or ‘hydrating’ if your skin tends to be dry. Silicone-based primers excel at blurring imperfections and creating a smooth, almost porcelain finish, while water-based options are fantastic for locking in moisture and providing a subtle tacky base for foundation adhesion. Seek out non-comedogenic primers to ensure your skin can breathe underneath layers of costume makeup, preventing breakouts and irritation even after hours of wear. A good primer will significantly enhance your foundation’s staying power, making it transfer-resistant and sweat-proof.
Highly Pigmented, Full-Coverage Base Products: For Opaque Whiteness and Vibrant Accents
For the iconic white bunny base, pigment density is paramount. Sheer foundations will not cut it. You will need a full-coverage, long-lasting liquid foundation or, for a truly opaque finish, a cream-based stage makeup or a dedicated white face paint. The key is to select formulas that dry down to a smudge-proof finish and build coverage without feeling heavy or cakey. For the delicate pink nose and inner ear details, highly pigmented cream blushes or eyeshadows are ideal. These provide rich color payoff that truly pops and adheres better than powdery counterparts, especially when layered over your primed base. Look for waterproof and transfer-proof claims on packaging, as these indicate superior adherence and resilience against moisture and friction.
Waterproof and Smudge-Proof Eye and Lip Products: Crisp Lines and Lasting Pout
The subtle whiskers, the outlined nose, and any other intricate facial details of your bunny character demand precision and unwavering durability. Invest in a high-quality, waterproof liquid eyeliner for crisp, black lines that will not run or fade. Gel eyeliners also offer impressive longevity and intense color. For lips, a long-wear liquid lipstick in a soft pink or nude shade will keep your bunny pout intact through sips and smiles. These formulas typically dry down to a matte finish, providing a transfer-proof seal. Do not forget to consider a waterproof mascara and a brow gel that offers strong hold to keep your brows defined and in place, completing the polished look.
Makeup Setting Spray: The Ultimate Lock-In
This is arguably the most crucial product for truly bulletproof Halloween makeup. A professional-grade makeup setting spray creates an invisible, protective barrier over your entire look, fusing all the layers together and preventing slippage, fading, and transfer. There are various formulations available: mattifying sprays for oil control, hydrating sprays to keep skin feeling comfortable, and ‘all-nighter’ sprays designed for extreme wear. For your bunny look, consider layering your setting spray. Apply a light mist after your primer, another after your foundation and contour, and a final generous veil once your entire makeup application is complete. This multi-layered approach ensures maximum durability, making your bunny makeup look sweat-resistant and incredibly long-lasting. Always choose a non-comedogenic option to avoid pore congestion, allowing your skin to breathe and stay clear even after a full night of festivities.
How do you achieve realistic ‘whisker’ strokes?
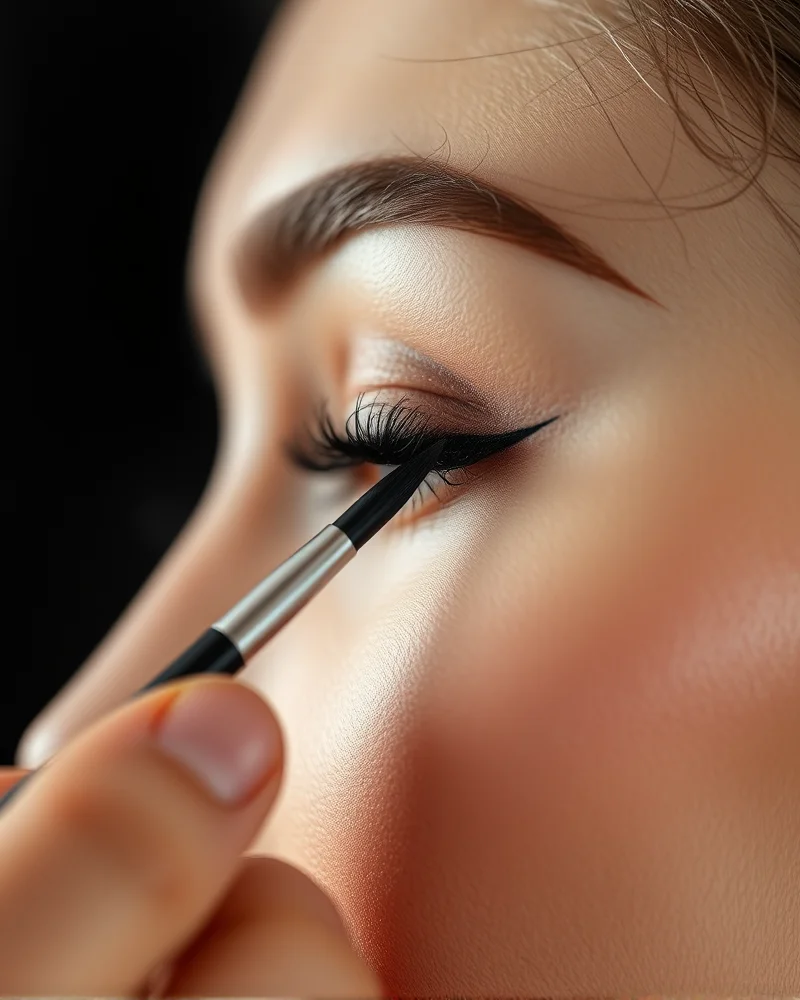
Achieving realistic whisker strokes is the defining technical challenge of any high-end bunny makeup look. The goal is to move away from thick, cartoonish lines and toward fine, tapered hairs that mimic the organic flow of fur. To master this, you must first select the correct tool. Felt-tip liquid pens, while convenient for cat-eye wings, often lack the precision needed for ultra-fine detail because their tips can blunt quickly. Instead, professional makeup artists prefer water-activated graphic liners paired with a fine-point, synthetic detail brush. These pigments allow you to control the consistency of your medium, ensuring the product is fluid enough to glide effortlessly without dragging on the skin.
Gel liners remain a reliable runner-up, especially for long-wear performance, as their waxy base resists smudging throughout a night of festivities. However, water-activated formulas offer the thinnest possible viscosity, which is essential for creating the hair-like texture of a whisker. Before you begin your application, ensure your canvas is prepped and set with a translucent powder to prevent the liner from skipping. As you finalize your look, remember that balancing your makeup with the right hairstyles for women is key to completing the overall aesthetic, whether you choose a sleek high ponytail or playful space buns to mimic bunny ears.
To execute the perfect whisker, follow this professional flicking technique:
- Start by saturating your liner brush with a thin, ink-like pigment, wiping off any excess to avoid heavy, blunt ends.
- Place the tip of the brush on the skin where you want the whisker to begin near the side of the nose.
- Apply light pressure to start the stroke, then instantly lift the brush away from the skin as you drag it outward. This creates a tapered, feathered effect that is thick at the base and invisible at the tip.
- Vary the length and angle of your strokes to avoid a uniform, artificial look. Whisker growth is naturally erratic, so layering shorter, subtle strokes over longer, more prominent ones will add significant depth and realism to your Halloween transformation.
How to choose the right nail color to match your bunny aesthetic?
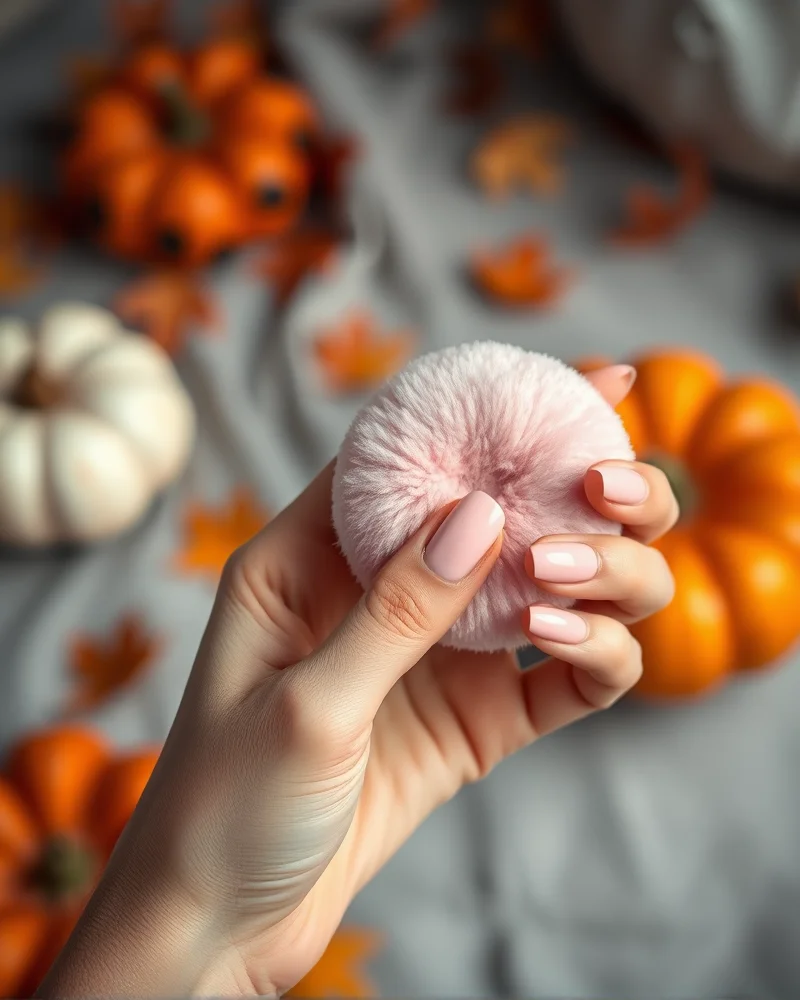
When crafting the perfect bunny makeup look for Halloween, your manicure acts as the vital bridge between your costume and your overall beauty narrative. At Nailosmetic, we believe that color theory plays a pivotal role in the psychology of your aesthetic. A bunny look is inherently soft and whimsical, so your nail choices should lean into palettes that emphasize delicacy while acknowledging the seasonal shift into autumn. Selecting the right shade is not merely about matching your dress; it is about creating a cohesive visual language that anchors your look.
Pastels and nudes are the foundation of this aesthetic. By utilizing softer tones, you counterbalance the slightly edgy nature of a Halloween costume with a touch of elegance. If you are aiming for a classic cottontail vibe, our curated selection of creamy nudes and baby pinks creates a seamless transition from your facial contouring to your fingertips. For those who prefer a more thematic approach, consider incorporating accent nails that feature intricate floral motifs or subtle shimmer finishes, which elevate the simple bunny theme into a high fashion statement. Below, we have mapped out the ideal color pairings to elevate your seasonal appearance.
| Aesthetic Focus | Recommended Nailosmetic Shade | Thematic Application |
|---|---|---|
| Classic Cottontail | Velvet Nude & Soft Petal | Use a full set of soft pinks to maintain a clean and innocent look that aligns with your nose contour. |
| Enchanted Forest | Sage Whisper & Creamy Taupe | Opt for earthy neutrals paired with botanical accent nails to mimic a woodland bunny environment. |
| Glittering Hare | Moonlit Pearl & Frosty White | Incorporate a shimmery white topcoat to add dimension and playfulness under party lighting. |
| Dark Whimsy | Muted Mauve & Soft Grey | Perfect for an edgy Halloween twist, these sophisticated tones bring a mature balance to your bunny whiskers. |
To truly master this look, pro-tips suggest applying a high-shine gel finish to make the lighter colors pop against your skin tone. If you are going for a textured look, our matte topcoats can provide a velvety finish that mirrors the soft aesthetic of fur. Whether you choose a solid minimalist manicure or decide to experiment with tiny bunny ear motifs on your ring finger, ensuring your polish long-wear quality is essential for a night of festivities. Nailosmetic provides the durability you need to ensure your manicure remains as pristine as your makeup throughout the entire celebration.
Can bunny makeup be adapted for high-fashion editorial styles?
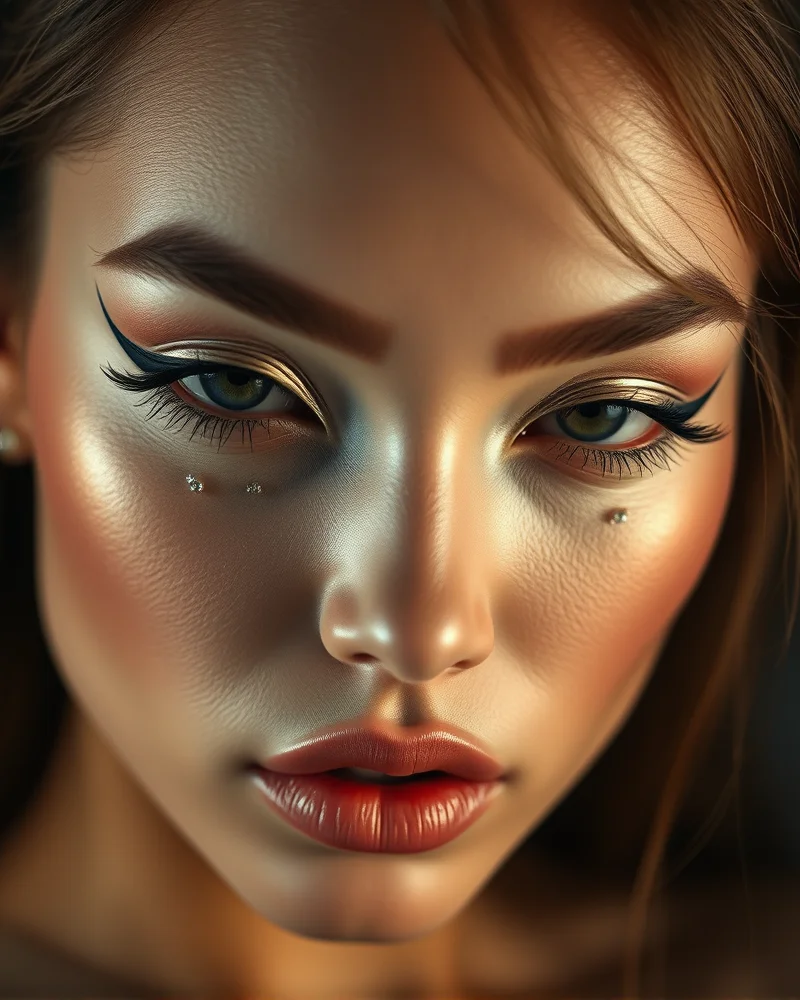
The transition from a standard Halloween costume to a high fashion editorial aesthetic is entirely possible with the right artistic approach. When moving away from literal interpretations of a woodland creature, the goal is to emphasize the concept of the bunny through luxury textures and avant garde makeup techniques. High fashion editorials often prioritize skin luminosity and geometric precision over realistic fur or whiskers. To achieve this runway aesthetic, start with a flawless base of glass skin. Instead of full face contouring, utilize a high pigment highlighter to accentuate the cheekbones and the bridge of the nose. This provides a clean, editorial canvas that looks radiant under both studio lights and social media ring lights.
To elevate the look, swap traditional face paint for refined graphic elements. Consider using black liquid eyeliner to draw sharp, minimalist graphic lines that hint at bunny features without mimicking them directly. A thin, elongated wing that curves slightly upward at the inner corner can suggest a feline or lagomorph eye shape in a way that feels intentional and chic. Replace the classic pink nose with a sophisticated, metallic or iridescent finish using high end cream pigments. You can further push the boundaries by incorporating intricate face jewelry or strategically placed embellishments. Here are a few professional techniques to elevate your bunny look:
- Apply micro crystals or Swarovski rhinestones in a constellation pattern around the orbital bone to mimic the ethereal, sparkling eyes of a bunny without the need for heavy color.
- Utilize gold leaf or fine glitter across the cupid bow to create a metallic, avant garde lip finish that catches the light during high end social events.
- Experiment with negative space eyeliner by drawing a floating crease that mimics the shape of bunny ears, keeping the rest of the lid bare for a modern editorial look.
- Incorporate wet look glossy eyelids using a clear, high shine eye gloss to achieve a editorial aesthetic that photographs beautifully for Instagram and TikTok content.
By focusing on these deliberate, luxury driven details, your bunny inspired makeup moves away from the realm of basic fancy dress and firmly into the territory of high fashion artistry. The key is balance. By keeping the color palette restricted to monochromatic tones or soft metallics, you ensure the look remains sophisticated enough for a gallery opening or an exclusive evening event while still paying homage to the core theme.
How to prep your skin for heavy Halloween pigment?
Achieving that flawless, porcelain-like base for your bunny makeup look requires more than just high-quality theatrical greasepaint. Before you apply a single drop of heavy white pigment, your skin barrier health must be the top priority. Heavy costume makeup often contains waxes and dense pigments that can easily congest pores and strip the skin of its natural moisture. To safeguard your complexion, you must create a protective buffer. I always recommend applying a thin layer of a non-comedogenic occlusive balm or a lightweight facial oil before reaching for your white cream base. This occlusive layer acts as a barrier, preventing the heavy makeup from sinking directly into your pores and making the eventual removal process significantly less abrasive for your delicate facial skin.
The removal process is just as critical as the application. When you are ready to transition from a whimsical bunny back to your daily look, you must commit to a thorough double-cleansing routine. Simply using a makeup wipe is insufficient because it often pushes pigment deeper into the skin rather than lifting it away. Start with a high-quality oil-based cleanser or a luxurious cleansing balm to emulsify the stubborn waxes and pigments. Massage this into your skin for at least sixty seconds to dissolve the heavy layers. Follow this with a gentle, pH-balanced water-based cleanser to sweep away any lingering debris and excess oil. This two-step approach ensures your pores remain clear and your skin remains hydrated, preventing the post-holiday breakouts that often follow intense makeup days.
While you wait for your skin to recover from your Halloween artistry, you might want to spend some downtime elevating your personal style with easy homecoming hairstyles that complement your aesthetic. Maintaining your skin health is a long-term investment, so always finish your double-cleanse by applying a soothing ceramide-rich moisturizer to support your lipid barrier. By treating your skin with this level of professional care, you ensure that your face remains a perfect canvas for all your future creative endeavors, whether you are dressing up for a photoshoot or a festive party.
What are the common mistakes to avoid when applying bunny makeup?
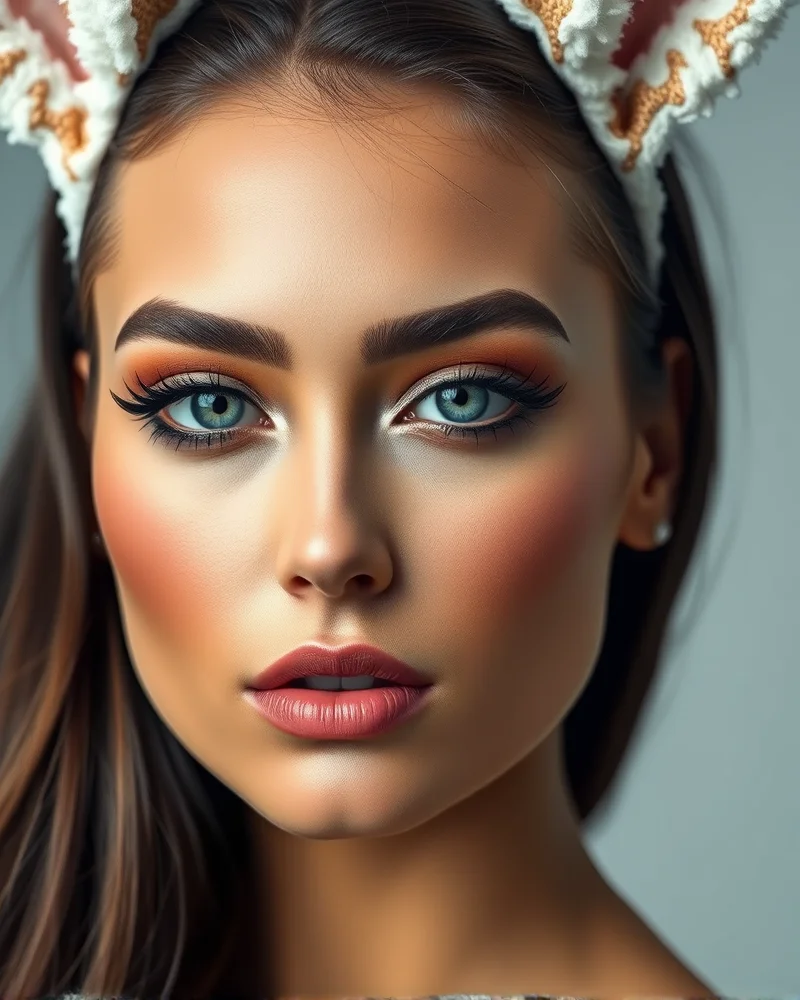
Creating the perfect bunny makeup look for Halloween requires finesse. When working with heavy pigments and intricate linework, small errors can transform a whimsical aesthetic into something less polished. Avoiding these pitfalls ensures your rabbit-inspired transformation remains high-fashion and camera-ready all night long.
Frequently Asked Questions: Troubleshooting Your Bunny Look
- Q: Why does my base makeup look cakey and textured after applying my bunny nose?
- A: Cakey foundation is usually the result of layering heavy greasepaint directly over liquid products without proper setting. When applying white or pink cream pigments for your muzzle, moisture from your base foundation can break down the top layer. To avoid this, apply a thin layer of translucent setting powder between each step. Ensure your base is completely dry before introducing your bunny nose color. Using a damp beauty sponge to gently press your pigment into the skin rather than rubbing it will provide an opaque, seamless finish without emphasizing dry patches.
- Q: How can I achieve symmetrical whiskers without them looking uneven?
- A: Achieving precise whisker placement is a common challenge for beginners. Instead of drawing freehand, use a fine-tip liquid eyeliner pen to map out small dots on both sides of your cheeks before connecting them. Always keep your face in a neutral, relaxed position while drawing; smiling or squinting can distort the placement of the lines once you relax your face. If one side looks slightly thicker, use a small angled brush dipped in micellar water to clean up the edges for a razor-sharp, professional aesthetic.
- Q: My pink nose and white muzzle look muddy rather than bright. How do I fix this?
- A: The key to vibrant color placement is color theory and layering. If you apply a light pastel directly over a dark contour or base, it will appear dull. Always start with a white cream base to neutralize your skin tone before applying your chosen shade of pink. If your colors are bleeding together, allow the muzzle area to set for three minutes before adding your nose pigment. Use a professional-grade setting spray to lock the colors in place, which prevents the pigments from shifting and turning into an unintended shade.
- Q: Is there a trick to making the bunny teeth look natural?
- A: Many users make the mistake of drawing teeth that are too large or too far apart. Use a stark white liquid liner to draw a small square shape over your upper lip. Add a very thin, dark line down the center to define the gap between the two front teeth. Less is more here. If the teeth are too bold, they can dominate your entire facial structure. Keep the lines delicate and use a matte finish to ensure they look like part of your skin rather than a heavy sticker.
How to incorporate prosthetics or 3D elements?
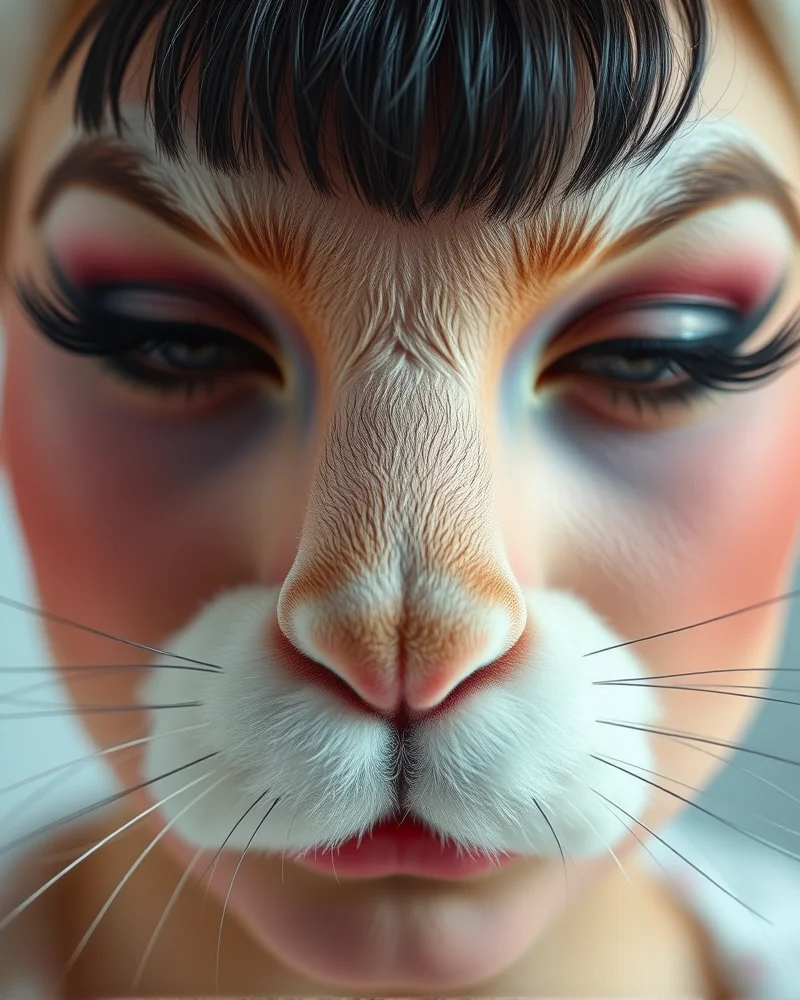
When you want to elevate your bunny makeup from a simple cosmetic application to a professional level transformation, incorporating three dimensional elements is the ultimate game changer. Moving beyond flat face paint allows you to capture the whimsical yet structural essence of a rabbit. One of the most effective ways to introduce depth is by using a small, lightweight nose prosthetic. You can source medical grade silicone or latex alternatives that adhere seamlessly to the bridge of your nose. To ensure your skin remains comfortable and free from irritation, always reach for a high quality latex free spirit gum. This adhesive is the industry standard for securing prosthetics without triggering allergic reactions, providing a robust hold that keeps your bunny snout perfectly in place through hours of Halloween festivities.
For the iconic whiskers, skip the traditional liquid liner strokes and opt for texture instead. Using synthetic lashes is an incredible pro tip for adding authentic dimension to your feline or leporid features. Select long, wispy synthetic lash strips, cut them into individual segments, and apply them directly to your muzzle area using your latex free adhesive. Because these fibers are designed to mimic real hair, they catch the light beautifully and create a dynamic, realistic movement that flat pigment simply cannot replicate. You might also consider layering these lashes over a base of white cream contour to ensure the whiskers pop against your skin tone.
If you prefer a more subtle approach, you can create 3D whiskers using thick, flexible silicone cord or even stiffened embroidery thread painted to match your palette. By anchoring these elements into a small mound of setting wax or prosthetic adhesive, you create a sturdy base that mimics the follicle structure of a rabbit. Always remember to seal these additions with a setting spray that contains alcohol or a professional grade makeup sealer. This locks every synthetic lash and prosthetic edge into place, ensuring your bunny makeup looks fresh and structural until the very end of your event. With these professional techniques, your bunny look will transition from a simple costume concept into a sophisticated piece of wearable art.
What is the ‘Cottagecore Bunny’ vs. ‘Dark Bunny’ aesthetic?
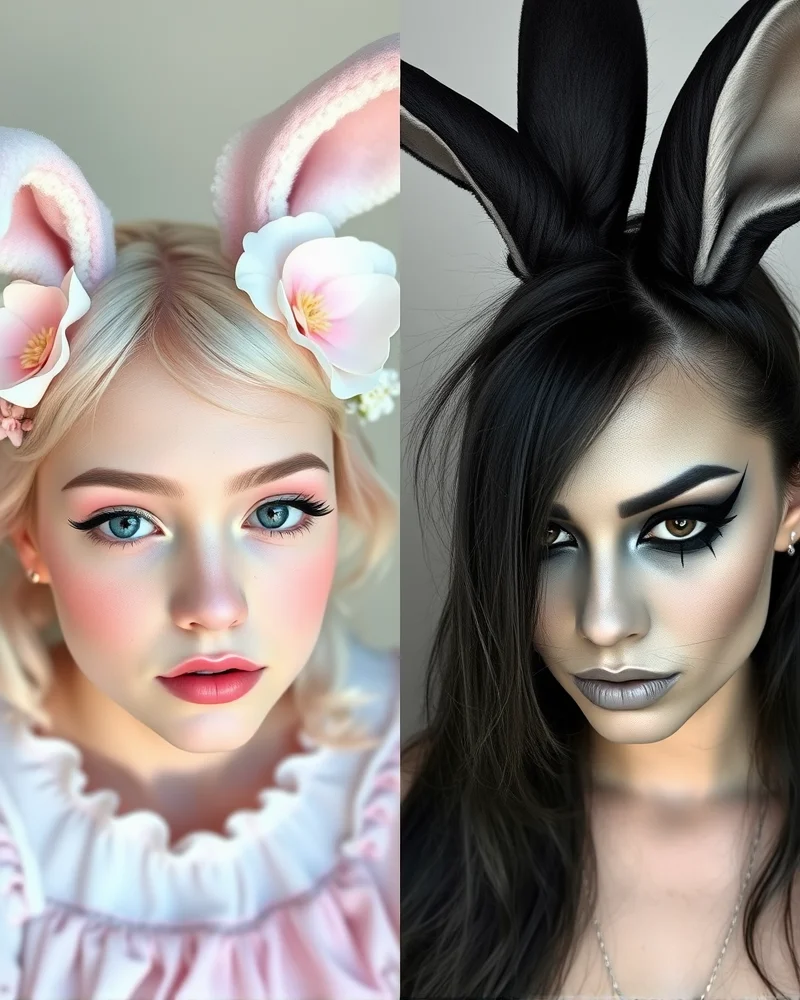
When planning your Halloween transformation, the bunny motif offers two distinct directions that cater to very different moods. Choosing between the Cottagecore Bunny and the Dark Bunny aesthetic depends entirely on whether you want to channel a whimsical, fairytale atmosphere or a gritty, cinematic edge. Understanding these two sub-trends is the first step in curating your overall costume look.
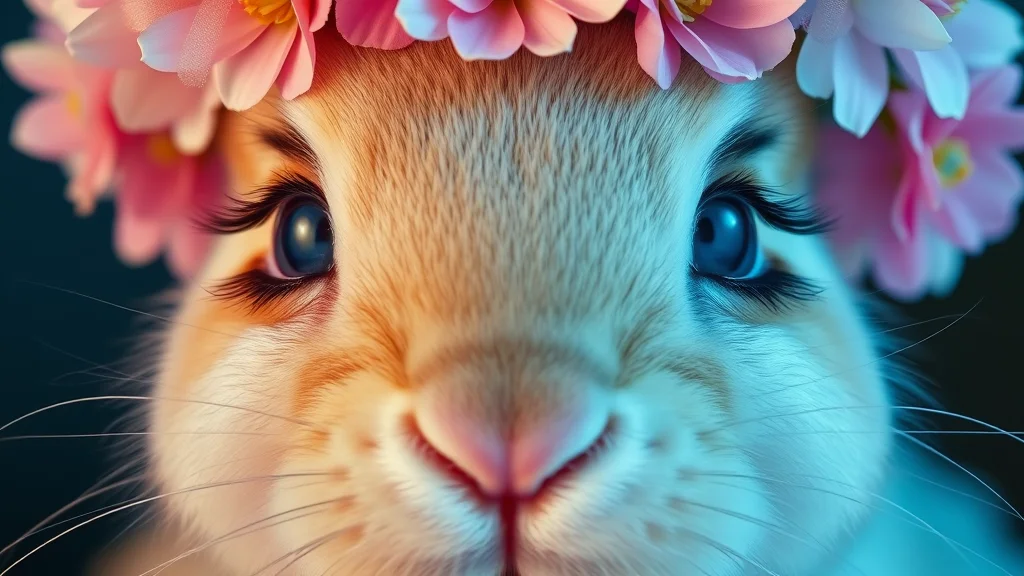
- The Cottagecore Bunny: This aesthetic is rooted in romanticism, softness, and vintage charm. The color palette revolves around gentle pastels such as baby pink, creamy white, and soft lavender. To achieve this look, focus on round, flushed features. Use a light pink blush high on the apples of your cheeks to create a doll-like effect and apply a soft white highlight to the tip of your nose. Floral accents are non-negotiable here, so consider incorporating dried baby’s breath or silk petals into your hair. If you are looking for styling inspiration that complements this whimsical vibe, check out these hair styles for hoco that work beautifully with floral accessories. The overall goal is to appear as though you have just stepped out of a storybook meadow. Keep your eyeliner thin and brown rather than black to maintain that dreamy, natural finish.
- The Dark Bunny: This variation leans into the gothic and mysterious side of Halloween. Think of this as the rebellious cousin to the cottagecore version. The palette shifts to deep grays, charcoal blacks, and blood reds. Instead of soft, rounded features, the Dark Bunny aesthetic focuses on sharp, intense lines. Use a precision liquid liner to create a dramatic, elongated nose and fierce, feline whiskers that look more dangerous than playful. Pro-tip: experiment with graphic smoky eyes that drag outward to create a haunting, feline-bunny hybrid look. Contouring is much heavier in this style, emphasizing hollow cheeks and a defined jawline. A matte black lipstick or a deep berry stain finishes the look, providing a stark contrast to the muted, monochromatic makeup palette. While the cottagecore look feels like a soft embrace, the Dark Bunny is designed to look striking, bold, and slightly unnerving under the moonlight.
Both styles allow for significant personalization, but staying true to your chosen color theory is the secret to a professional result. Whether you opt for the whimsical softness of the meadow or the sharp intensity of the dark forest, ensure your blending brushes are clean to maintain the crispness of your lines.
How to maintain your look throughout the entire night?
Securing a flawless bunny makeup look requires more than just high quality pigments. To ensure your rabbit nose and whiskers remain pristine from the first party to the final photograph, you must master the art of long wearing application and strategic maintenance. Start by prepping your skin with a mattifying primer to provide a smooth canvas. Once your foundation is set, applying a translucent setting powder using the baking technique is essential. By pressing a generous amount of powder into your T zone and over the painted nose area with a damp beauty sponge, you lock the makeup into place and prevent the oils from your skin from breaking down the pigment.
When it comes to the iconic bunny nose pigment, cracking is the primary concern for most enthusiasts. This usually happens when the paint dries out or when the skin underneath moves too much. To prevent this, apply your pigment in thin layers rather than one thick application. If you are using a cream based paint, always set it immediately with a matching eyeshadow or a loose setting powder. This double layer method acts as a sealant. If you feel the area becoming tight or dry throughout the evening, avoid adding more liquid paint, which can cause clumping. Instead, carry a high quality fixing spray in your kit. A light misting can refresh the makeup and keep the finish looking dewy rather than brittle.
Your compact touch up kit should be curated for efficiency. I recommend keeping the following items in a small, discreet pouch:
- A travel size setting spray to refresh hydration without disturbing the pigment.
- A precision eyeliner pen to quickly redefine any whiskers that may fade or smear.
- Pressed translucent powder and a small puff for blotting away unwanted shine.
- A clean, disposable mascara wand to blend away any fallout from your lash application.
- A small jar of your primary nose color for emergency spot corrections.
By keeping these tools accessible, you can perform a quick inspection in the mirror every few hours. Remember that the secret to longevity is vigilance. Blotting your face with a clean tissue before reapplying powder will remove sweat and sebum, ensuring that your final touch up looks just as vibrant and smooth as your initial morning application.
What is the best way to remove Halloween makeup safely?
When the festivities of Halloween conclude, the true challenge begins: removing your bunny makeup without compromising the integrity of your skin barrier. Halloween cosmetics often utilize heavy pigments, spirit gum, and long-wear formulas that can clog pores if not addressed with precision. To avoid post-holiday breakouts and irritation, a strategic removal process is essential.
Follow these steps to ensure your skin remains clear and healthy after your transformation:
- Begin with an oil-based cleanser: The secret to dissolving stubborn face paint and adhesives is a high-quality cleansing balm or oil. Massage the product into dry skin using circular motions. The oils work to break down the hydrophobic bonds in waterproof eyeliner and heavy foundation. Emulsify the product with a small amount of warm water before rinsing, as this ensures that all debris is lifted away from the surface of your pores.
- Perform a double cleanse: After rinsing the initial layer of oil, follow up with a gentle, water-based cleanser suited to your skin type. This second step removes any lingering residue or trapped dirt, ensuring your complexion is perfectly prepped for your nightly skincare routine.
- Utilize professional-grade makeup removers for prosthetics: If you used spirit gum or latex for your bunny nose, do not pull or tug at your skin. Instead, saturate a cotton pad with a specialized adhesive remover or an oil-based solvent and hold it against the area for thirty seconds. This allows the bond to loosen naturally, preventing micro-tears in the delicate skin.
- Gently exfoliate to clear congestion: Once the makeup is removed, use a mild chemical exfoliant such as lactic acid or a gentle enzyme peel. This step is crucial for clearing out the follicle openings that were blocked by heavy face paints throughout the night. Avoid harsh physical scrubs, as your skin may already be sensitive from the day of application.
- Restore hydration: Follow your cleansing process with a soothing serum containing hyaluronic acid or ceramides to replenish moisture. A rich night cream will serve as a final barrier to lock in hydration and promote overnight recovery.
By prioritizing this thorough removal routine, you protect your skin from potential inflammation, allowing you to return to your natural glow immediately after the holiday excitement fades.
Why is Nailosmetic the go-to for seasonal beauty transformations?
At Nailosmetic, we believe that seasonal transformations should never come at the expense of your skin health. When you are crafting a detailed bunny makeup look for Halloween, you are often layering multiple products, from long-wear foundations to intricate eyeliner designs. This is precisely why Nailosmetic has become the trusted authority for beauty enthusiasts worldwide. We prioritize high-performance formulations that marry professional grade durability with skin-loving ingredients. Our commitment to excellence means that every pigment, primer, and setting powder we develop is subjected to rigorous quality testing. We avoid harsh chemicals and heavy synthetics that can lead to irritation during long festive nights, ensuring that your delicate facial skin remains hydrated, nourished, and breathable even under the weight of dramatic Halloween artistry.
Empowerment is the true heartbeat of our brand philosophy. We view makeup not merely as a mask, but as a dynamic medium for self-expression. Whether you are aiming for a whimsical and soft bunny aesthetic or a moody, avant-garde interpretation, Nailosmetic provides the professional tools you need to push your creative boundaries. Our extensive color palettes are designed with high pigmentation and blendability in mind, allowing you to achieve seamless gradients and sharp, clean lines that define a master-level look. We celebrate the intersection of artistry and inclusivity, ensuring that our products perform flawlessly on every skin tone and texture.
Beyond our ingredients, Nailosmetic serves as a creative partner for your beauty journey. We offer more than just cosmetics, as we curate community-driven tutorials and pro-tips that help you master advanced blending techniques, contouring strategies, and long-lasting application methods. By choosing Nailosmetic for your holiday beauty preparations, you are opting for a brand that honors your individuality. We invite you to experiment boldly and express your unique vision with total confidence. When you reach for our products, you are not just applying makeup, you are investing in a premium experience that respects your skin and amplifies your personal style, ensuring that your Halloween transformation is as comfortable as it is captivating.
Mastering the bunny makeup look is all about the synergy between bold artistic choices and quality product application. By balancing your facial contouring with the precision of high-quality tools—and the perfect finishing touch from your manicure—you ensure a look that is not only memorable but professional. Visit Nailosmetic to finalize your look and embrace the Halloween season with confidence.