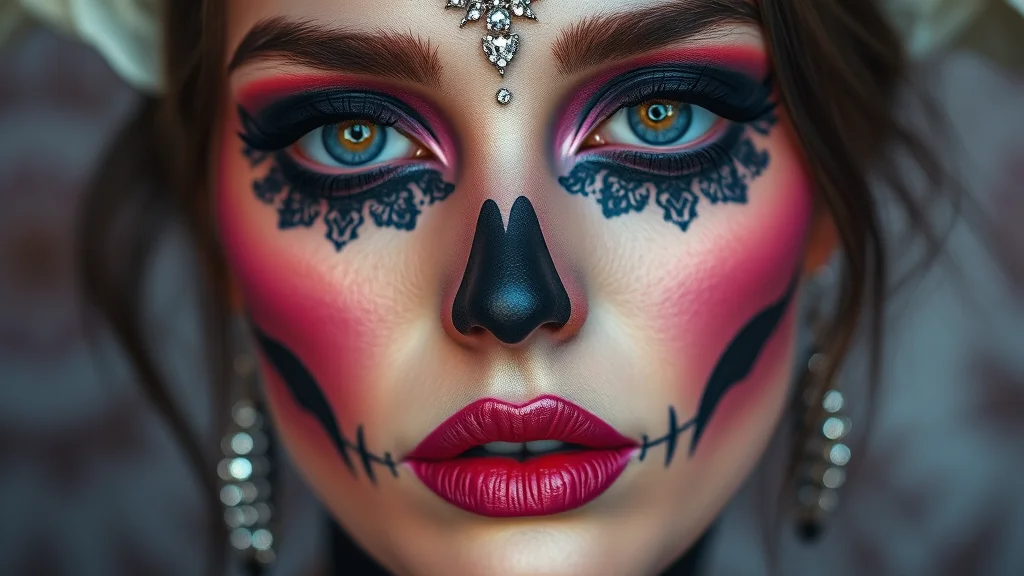
Spooky Cute Skull Makeup Easy

Spooky cute skull makeup is the ultimate fusion of macabre aesthetic and playful charm, and it is officially the most searched Halloween trend of 2024. Whether you are a professional MUA or a beginner, you don’t need a complex FX kit to achieve this look—just a high-quality white cream base, a precise black liquid liner, and the right color palette. Many enthusiasts are pivoting away from heavy prosthetics, instead switching to intricate, wearable ‘glam-skull’ designs that prioritize skin texture and aesthetic polish. To complete your look, you must pair your face art with the perfect seasonal manicure, which you can find curated at [Nailosmetic](https://nailosmetic.com/). From matte velvet textures to metallic chrome accents, your nails provide the necessary foundation for your spooky aesthetic. Ready to master the look that everyone is copying? Read on to discover the exact techniques to achieve a flawless finish in under thirty minutes.
Why is the ‘Spooky Cute’ Skull Trend Dominating Social Media?
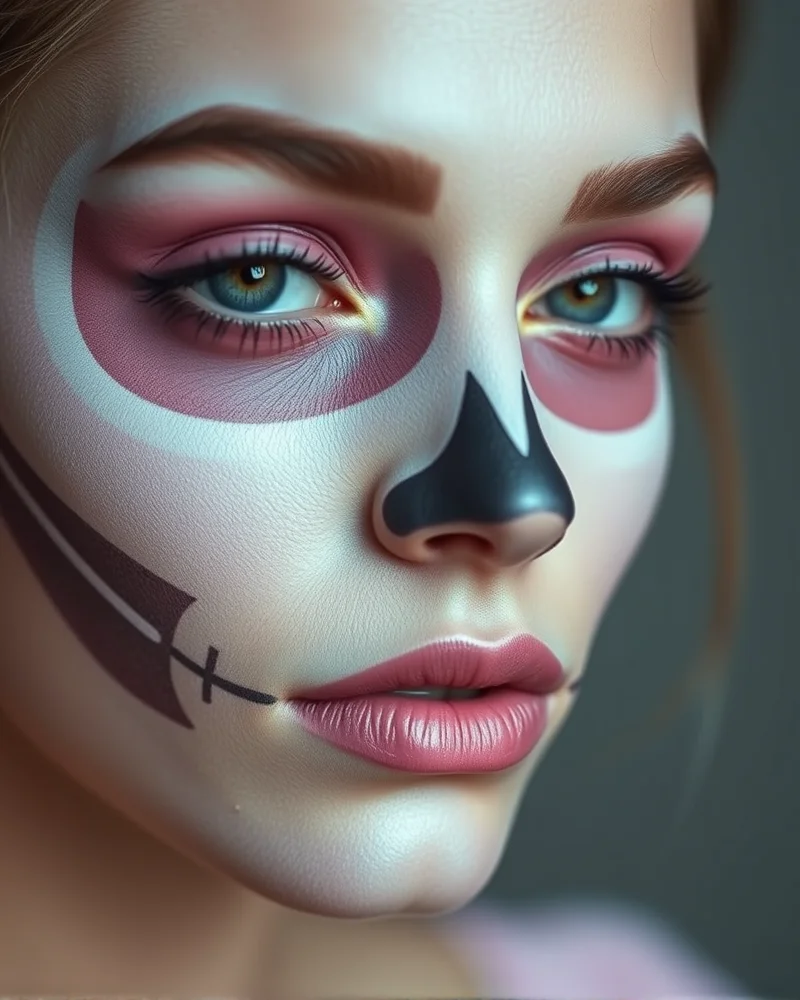
The aesthetic landscape of the cosmetic industry trends has undergone a fascinating transformation, moving away from hyper-realistic and gory special effects toward the charmingly morbid world of spooky cute skull makeup. This shift is deeply rooted in the rise of kawaii-goth, an intersectional style that harmonizes the dark allure of macabre imagery with the soft, playful aesthetics of Japanese pop culture. Social media platforms like TikTok and Instagram have acted as catalysts for this movement, as users gravitate toward content that feels authentic, approachable, and highly shareable. Unlike traditional cinematic SFX makeup that requires professional prosthetics and hours of application, this trend embraces minimalism. It celebrates the artistry of clean lines and pastel palettes, proving that Halloween beauty can be sophisticated without being intimidating.
Data analytics across beauty sectors show a significant surge in consumer preference for DIY makeup kits that prioritize ease of use and versatility. Modern consumers are increasingly shying away from complex, heavy latex applications in favor of high-pigment liners and versatile eyeshadow palettes that serve dual purposes for everyday wear and holiday costume design. This DIY-friendly approach to Halloween beauty allows for greater self-expression, as individuals feel empowered to experiment with their own unique interpretation of the skull motif. Whether it is adding glitter accents to a skeletal jawline or replacing harsh black contours with shades of lavender and pink, the trend emphasizes personal agency over technical precision.
Furthermore, the sociological shift toward the spooky cute aesthetic reflects a desire for comfort in the uncanny. By softening the edges of traditional skull makeup, beauty enthusiasts are reclaiming Halloween as a space for creativity that does not require sacrificing personal style or elegance. This minimalist philosophy is a direct response to the fatigue surrounding over-produced, professional-grade media imagery. It encourages a community-led beauty standard where the focus is on the joy of the creative process rather than the perfection of the final result. As we look at current search trends, it is evident that the demand for quick, tutorial-driven content will continue to shape the industry, positioning the spooky cute skull as a staple for the modern, expressive makeup lover.
What Essential Tools Do You Need for Easy Skull Makeup?
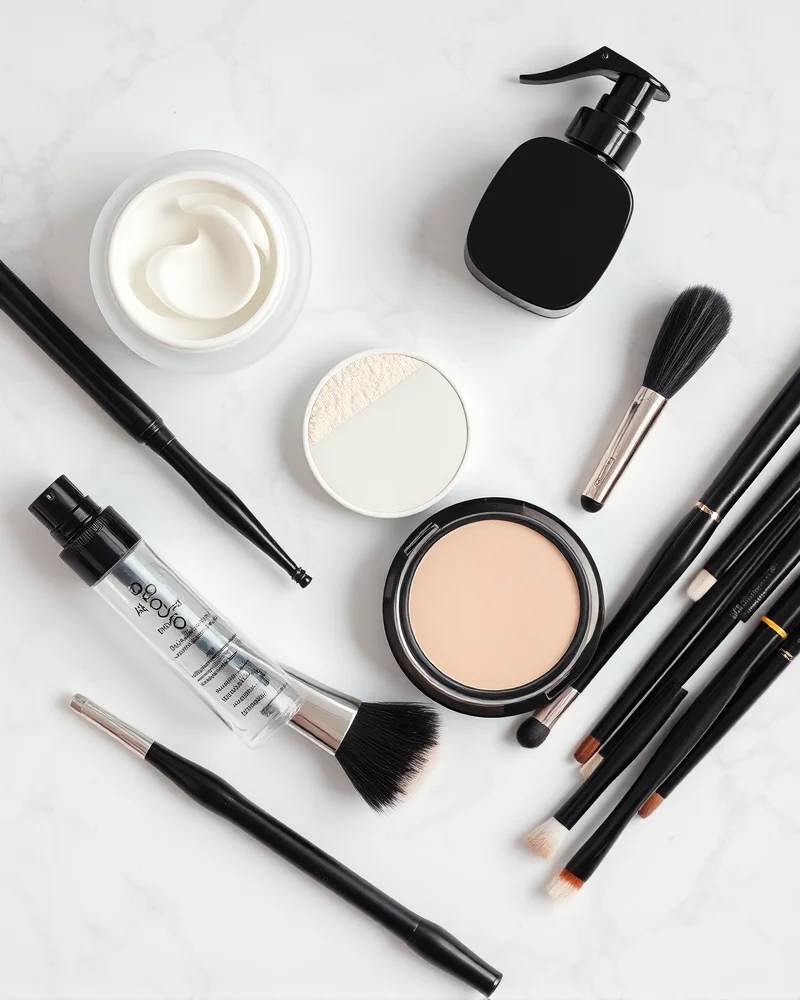
Creating a captivating spooky cute skull look does not require a professional makeup artist kit, but it does demand a strategic selection of high quality products. To achieve that pristine, skeletal aesthetic that looks crisp on camera and holds up throughout your festivities, you need to focus on texture and opacity. Many beginners make the mistake of using standard Halloween greasepaint, which often slides off the skin, creases instantly, and feels heavy. Instead, prioritize a professional grade cream paint. While standard drugstore cream makeup is often sheer and oily, theater quality paint is formulated with a higher concentration of pigment, offering superior coverage that dries down to a comfortable, matte finish. This is the difference between a messy, sliding base and a clean, bone-like canvas.
Precision is the hallmark of a high-end skull transformation. When outlining the teeth, the nasal cavity, and the deep, hollow eye sockets, you cannot rely on blunt pencil liners. You need an ultra fine, high pigment liquid or gel eyeliner pen. These tools are the secret weapon for achieving razor sharp edges. A liquid liner with a flexible felt tip allows you to maneuver around the curves of your cheekbones with ease. Because these liners are saturated with deep, opaque pigment, you only need one pass to create the stark contrast required for a hauntingly beautiful aesthetic.
To ensure your hard work stays in place, a robust setting routine is non-negotiable. Using a translucent setting powder will lock your cream base into position, preventing any unwanted smudging. Finally, a professional setting spray acts as the ultimate seal, shielding your makeup against heat, sweat, and movement. Below is your curated checklist for the perfect spooky cute skull kit.
Essential Tool Checklist
- High Opacity Cream Paint: Look for theater grade white paint that offers full coverage without cracking.
- Precision Liquid Eyeliner Pen: Opt for a waterproof formula with a micro tip for those intricate dental and bone details.
- Translucent Setting Powder: Use a finely milled powder to mattify the skin and absorb excess oils.
- Professional Setting Spray: Choose a formula that promises long wear to ensure your look lasts for hours.
- Multi-Sized Makeup Sponges: These help you blend the white base evenly, ensuring no streaks appear before you start your detailing.
- Angled Eyeshadow Brush: This is perfect for contouring the hollows of your cheeks and temples with grey or black eyeshadow.
How Do You Prep Your Skin for a Long-Lasting Skull Look?
Achieving a flawless skull makeup look that lasts from sunset until the stroke of midnight requires more than just high quality face paint. The secret truly lies in your skin preparation. Because white greasepaint or cream makeup tends to sit heavily on the pores, your primary objective is to create a smooth, protective barrier that keeps your skin hydrated without causing the product to slip or crack as your expressions change throughout the night. If you neglect this foundational step, you will likely encounter that dreaded texture where the paint settles into fine lines or begins to flake off during the festivities.
Start by cleansing your face thoroughly to remove natural oils, followed by a lightweight, oil free moisturizer. Proper hydration is the silent partner to a long wear finish, as dehydrated skin will greedily soak up the moisture in your makeup, leading to premature cracking. Once your skin feels plump and hydrated, apply a non comedogenic silicone based primer. Silicone acts as a velvet smooth bridge between your pores and the makeup, providing a physical barrier that keeps your skin from absorbing the pigments while ensuring the white paint adheres evenly. By filling in micro textures, this primer creates a canvas that stays flexible, effectively preventing the paint from webbing or crumbling when you smile or speak.
As you build your base, you may find that managing the balance between a matte finish and necessary hydration is the most difficult part of the process. If you want to achieve a professional look that pairs perfectly with stunning hairstyles for women, focus on setting your primer with a translucent, finely milled powder before applying any color. This creates a dry, tack free surface that grips the greasepaint. Once your skull details are complete, lock everything in with a generous misting of a professional grade setting spray. By creating this multi layered seal, you prevent the friction of clothing or movement from disrupting your artistic work. Always remember that the longevity of your spooky cute look is directly proportional to the quality of your prep work, so take your time to ensure your canvas is perfectly primed before reaching for those brushes.
Step-by-Step: How to Master the Perfect Skull Eye Socket
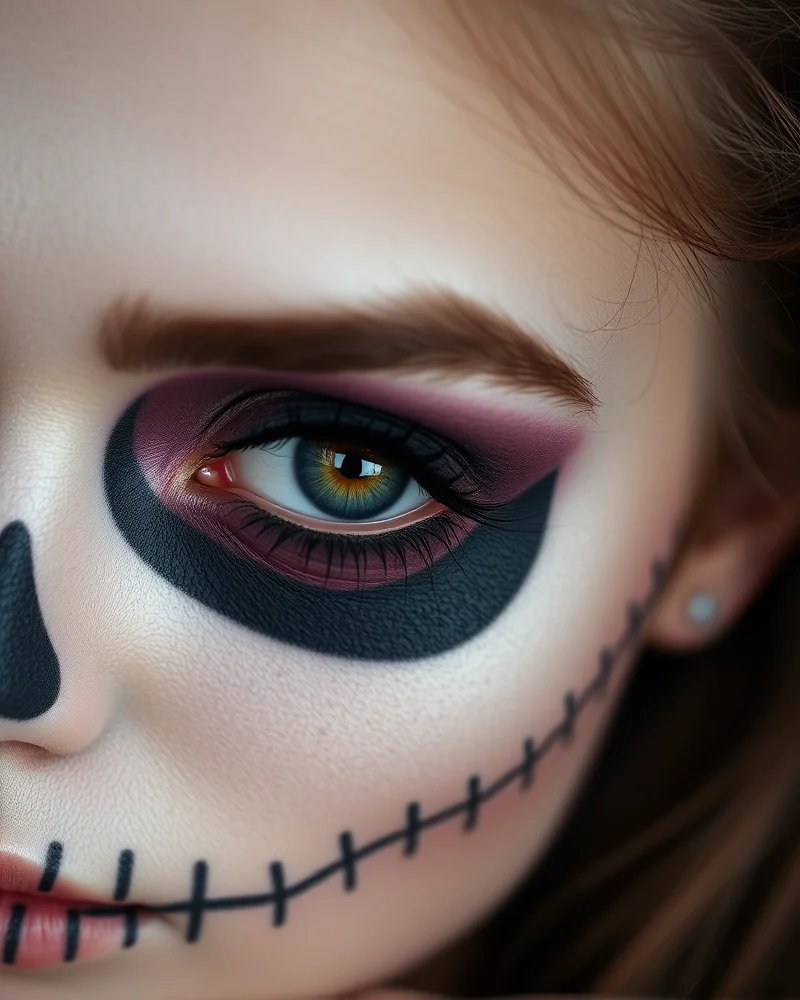
Creating the quintessential skull eye socket is the most important element of your spooky cute aesthetic. To begin, you want to focus on strategic eye contouring that mimics the depth of a skeletal cavity without looking aggressive. Start by using a small, dense shader brush to apply a pigmented black eyeshadow in a circular shape around your orbital bone. Do not worry about being perfectly symmetrical at first, as the goal is to map out the hollow areas that define the skull structure. The trick to keeping this look approachable and cute is to avoid harsh, jagged edges that feel too gothic or horror-themed. Instead, use a soft, fluffy blending brush to diffuse the pigment outward into your skin, creating a gradient that transitions from intense charcoal at the center to a subtle gray at the perimeter.
Once your base shadow is placed, it is time to refine the shape. Utilize liquid eyeliner precision to carefully trace the inner boundary of your eye socket. This adds a clean definition that makes the hollows pop against your face. If you find the black looks too severe, blend a hint of matte mauve or soft plum eyeshadow into the edges of the black shadow. This pop of color softens the overall appearance and adds a whimsical touch that fits the spooky cute vibe perfectly. For an extra layer of charm, leave a small portion of your natural lid visible or apply a subtle highlight in the very center of the socket to mimic depth without making the eyes look sunken.
- Use a cream-based product first for better grip and intensity.
- Always tap, do not swipe, your eyeshadow to maintain pigment density.
- Clean up the edges with a damp cotton swab or a bit of concealer to ensure the shape is crisp but rounded.
- Incorporate lighter shades like taupe or light brown to create a 3D effect that feels more sculptural than scary.
By layering your blending techniques and focusing on smooth, rounded shapes, you ensure the eyes remain the focal point of a playful costume rather than a terrifying one. Remember that the beauty of this look lies in the balance between the dark intensity of the eye sockets and the softness of your facial features. Take your time to build the color gradually, and you will achieve a polished result that looks professional, clean, and perfectly aligned with current social media trends.
What Are the Best Techniques for Shading and Dimension?
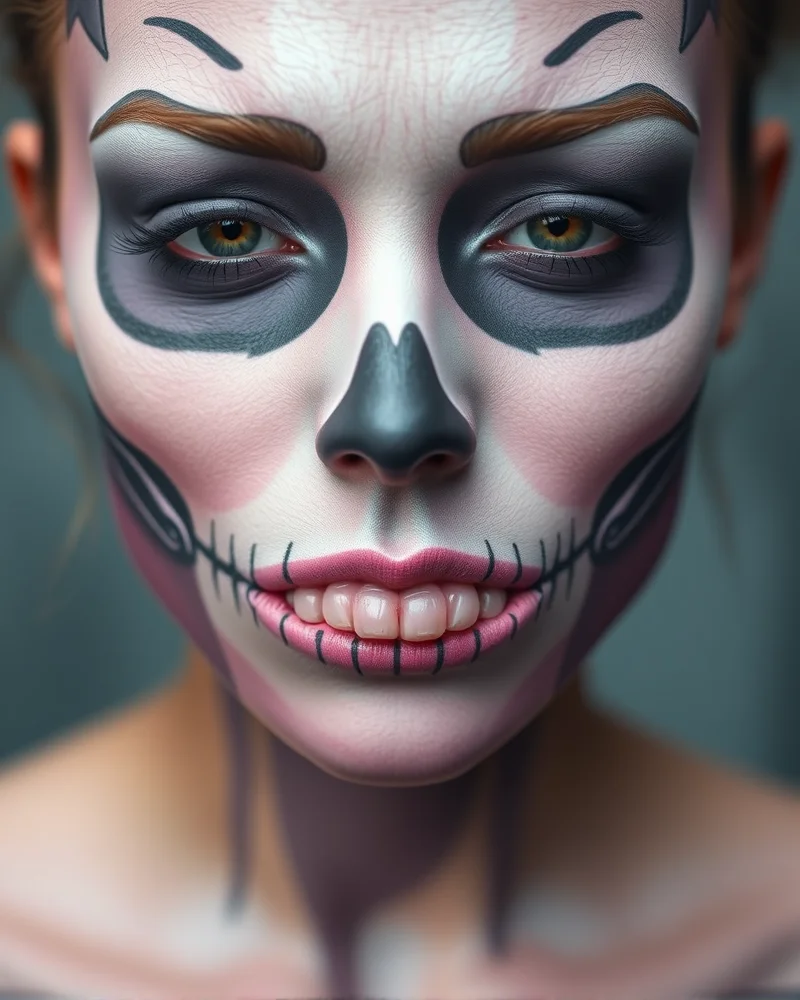
When you aim for spooky cute skull makeup, the secret to elevating your look from a basic costume to a refined piece of art lies in your ability to manipulate light and shadow. The most common pitfall is heavy handed application that leaves you looking like a tired zombie rather than a chic, skeletal beauty. To avoid this, you must master the art of grey scale contouring. Instead of relying solely on stark black pigments, utilize a spectrum of cool toned greys, taupes, and muted charcoals. These shades mimic the natural recesses of human bone structure, allowing you to sculpt your face without adding unnecessary harshness or dullness to your complexion.
Think of your face as a topography map. Your goal is to identify where the bone recedes and where the light naturally hits. For the cheekbone hollows, temple depressions, and the bridge of the nose, build up your depth gradually. Start with a light grey transition shade to map out the placement before deepening the center with a concentrated matte black. This gradient effect creates a three dimensional illusion that looks soft and intentional. If you feel the look becoming too dark, blend outward toward the hairline using a clean fluff brush to ensure the shadows dissipate into your skin tone rather than ending in a sudden, muddy streak.
Precision is just as important as the depth of your pigment. A soft skull aesthetic requires a delicate balance between diffused shadow and crisp, defined lines. Using the wrong tool can make your edges look smudged or your lines appear shaky. Refer to the table below to determine which brush will help you maintain that polished, professional finish.
| Brush Type | Primary Function | Why It Matters for Skull Art |
|---|---|---|
| Small Tapered Blending Brush | Softening Edges | This tool prevents harsh lines in your contour zones, ensuring that the shadows look like natural hollows in the skull structure. |
| Fine Tip Liner Brush | Precision Detailing | Essential for drawing the delicate nasal cavity, teeth lines, and the cracks in the bone surface with total control. |
| Angled Contouring Brush | Sculpting Cheekbones | The angled bristles fit perfectly under the zygomatic arch, allowing for an immediate, sharp definition that creates the spooky cute look. |
| Flat Shader Brush | Packing Pigment | Use this to apply high intensity black shadow in the eye sockets or nose tip before blending it out to create density. |
Pro tip: always keep a damp beauty sponge nearby. If you accidentally apply too much shadow, use the sponge to gently tap and lift excess pigment. This technique maintains the clean, artistic integrity of your skull design while keeping the finish smooth and hydrated.
How Can You Make Your Skull Look ‘Cute’ Instead of Scary?
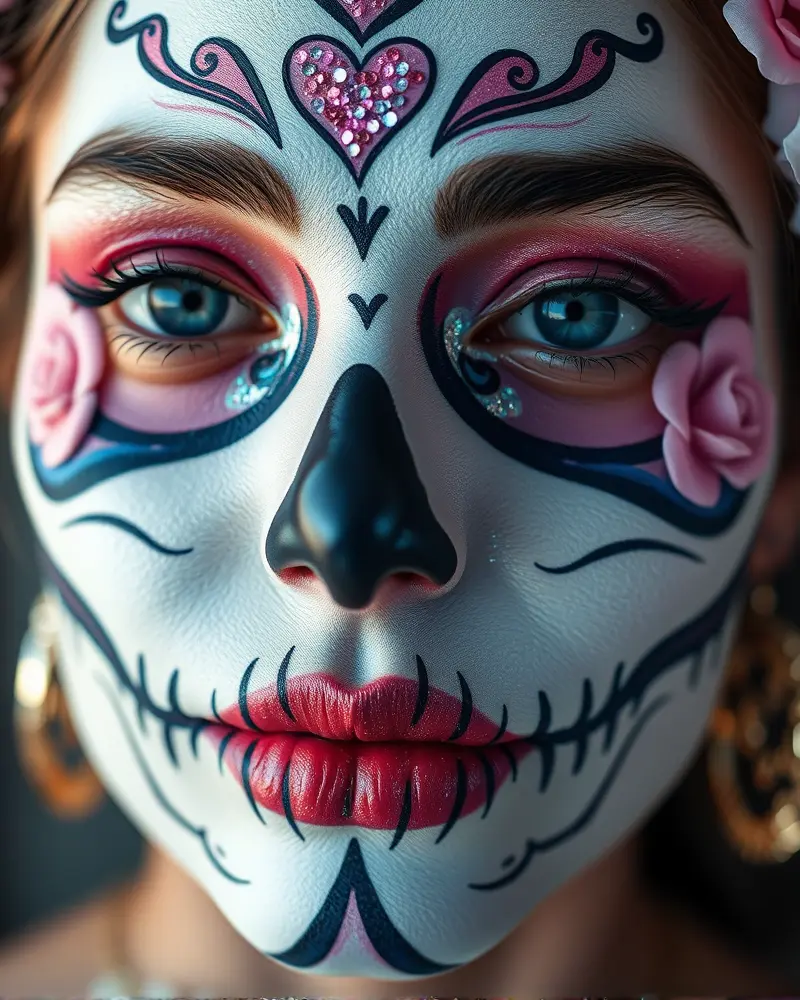
Transforming the classic skull motif into something truly adorable requires a deliberate shift away from macabre realism toward a whimsical, kawaii aesthetic. Achieving this look is all about the psychology of visual balance. In makeup artistry, humans are naturally drawn to features that mimic youthful proportions, such as larger eyes, softer edges, and rounded shapes. When you replace harsh, jagged lines with graceful curves, you immediately soften the impact of the skull design, turning a traditional Halloween staple into a playful fashion statement. This approach is perfect for those who want a festive look that remains approachable and fun, perhaps even coordinating with back to school makeup for teens trends that emphasize individuality and self expression.
To lean into this aesthetic, focus on color palettes that deviate from standard monochrome. Incorporate soft pastel highlights like baby pink, lavender, or mint green around the periphery of your shaded areas. Instead of a sharp, triangular nose cavity, opt for a perfectly symmetrical heart shape. This tiny modification drastically changes the perceived mood of the face from menacing to sweet. Furthermore, introducing floral accents is a brilliant way to break up the skeletal geometry. Painting small, delicate daisies or roses across the cheekbones or temple area adds an organic, soft touch that contrasts beautifully with the stark white base of the skull.
Glitter is your greatest ally when striving for that ultimate spooky cute vibe. Do not be afraid to layer iridescent or holographic glitter over your eye sockets to create a celestial, ethereal effect. Applying a fine dusting of shimmer along the bridge of the nose or the brow bone highlights the high points of the face, keeping the look luminous rather than sunken. By balancing the dark, hollowed out areas with reflective particles and soft, rounded floral motifs, you successfully disrupt the scary association. The goal is to keep the skeletal structure recognizable while layering on decorative elements that exude joy, turning your face into a canvas of curated, artistic charm that feels both festive and perfectly on trend.
Which Eyeliner Techniques Ensure Sharp Lines?
Achieving the surgical precision required for skull makeup depends entirely on your choice of eyeliner and your physical application technique. When executing detailed skeletal features like teeth, nasal cavities, or orbital borders, you must decide between a liquid pen tip and a traditional brush pot with gel liner. Pen tip liners are the gold standard for beginners and those seeking speed because they provide a consistent flow of pigment without the need for constant re-dipping. However, for the most intricate skull details, professional makeup artists often favor a fine tipped synthetic brush paired with a high pigment gel pot. This combination allows for superior control over the thickness of your lines, which is essential when you need to switch between thin, delicate teeth outlines and bold, heavy socket borders.To master these sharp lines, you must focus on steady hand makeup tips that stabilize your movements. One of the most effective methods is to anchor your pinky finger against your cheekbone while drawing. This tripod position creates a physical bridge between your hand and face, significantly reducing the tremors that cause shaky lines. If you struggle with skipping, it is usually because you are pressing too hard. Light pressure allows the product to glide effortlessly over the skin texture rather than dragging and pulling the liner into gaps. Always remember that building your lines in thin, consecutive layers is far more effective than trying to draw a single perfect stroke.- Avoid smudging by setting your eyeliner with a matching matte black eyeshadow using a small angled brush.
- Fix uneven symmetry by working on both eyes simultaneously. Instead of finishing one socket entirely, alternate between sides to ensure the shape and scale remain balanced as you build.
- If you experience uneven lines, use a clean pointed cotton swab dipped in micellar water to sharpen the outer edges. This acts like an eraser for your makeup and allows for razor sharp precision.
- Ensure your eyelid is taut by gently pulling the skin toward your temple, which creates a smooth canvas for the applicator tip to traverse.
Can You Use Your Daily Makeup Bag for Skull Art?
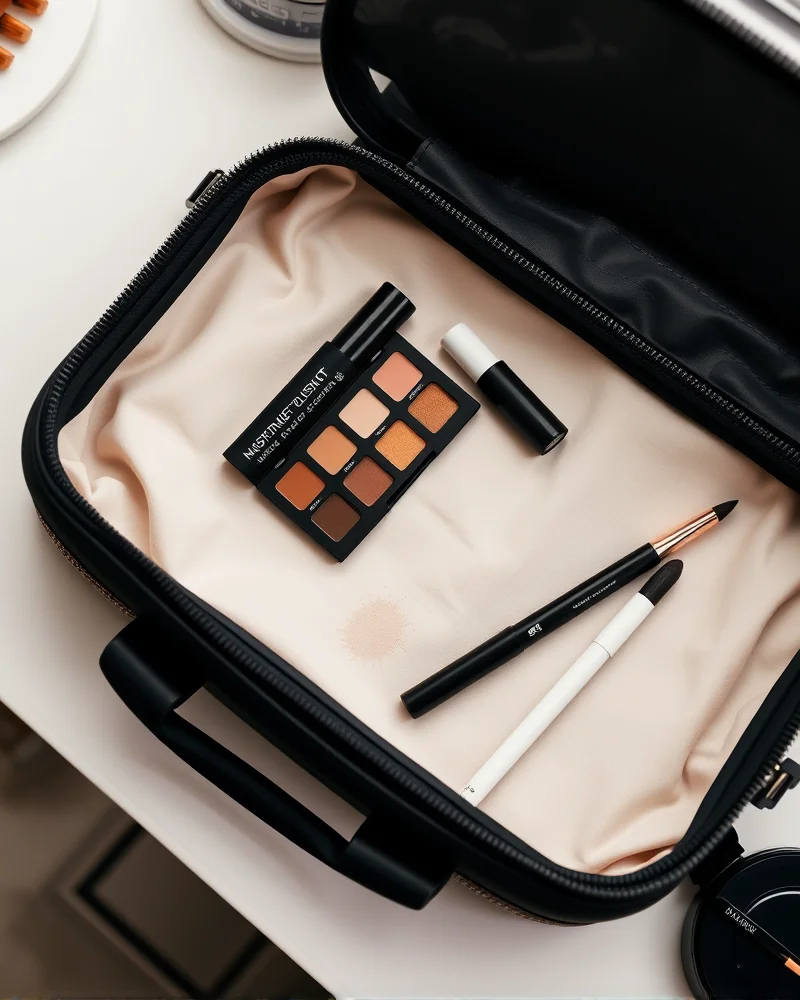
You do not need to invest in professional theater supplies or high-cost special effects kits to create a hauntingly beautiful skull look. In fact, the most effective tools for achieving this style are likely already sitting right on your vanity. Your daily makeup collection is surprisingly versatile when you apply a bit of strategic creativity. By repurposing your standard cosmetics, you can control the opacity and blending of your skull art, ensuring a look that feels authentic to your personal style while keeping your budget entirely intact.
- Eyeshadow Palettes: Your neutral matte eyeshadow palettes are the secret weapon for creating depth. Use deep espresso or charcoal shades to contour your cheekbone hollows, temple areas, and the bridge of your nose. A soft, fluffy blending brush helps you transition from harsh lines to a realistic, sunken bone appearance. Avoid shimmers for the primary shading, as they reflect light and counteract the desired hollow effect of a skull.
- Eyebrow Pomade or Gel: High-pigment eyebrow pomade is often superior to professional face paint for detailing. Because it is designed to be smudge-proof and long-wearing, it provides the perfect consistency for drawing sharp nasal cavities and the iconic vertical skull teeth. Use an angled brush to carve out precise shapes. Since these products are formulated to cling to the skin, your skull design will remain intact throughout your festive activities.
- Matte Lipsticks: Do not underestimate the power of a liquid lipstick. A classic matte black or deep berry liquid lipstick serves as an excellent base for the eyes and nasal cavity. Because these formulas are highly pigmented, they cover large surface areas quickly without requiring multiple layers. You can even use a small amount of dark lipstick on a liner brush to add subtle cracks or weathering effects around the jawline.
- White Eyeliner or Concealer: To make your skull ‘pop’ and achieve that 3D dimension, reach for your brightest white liquid eyeliner or a high-coverage concealer. Use these to highlight the ‘teeth’ and the upper ridge of the orbital bones. Adding white highlights directly above your contour lines creates the illusion of bone texture, effectively turning flat makeup into a multidimensional piece of art.
By leaning into your existing inventory, you gain the ability to experiment with textures that feel comfortable on your skin. These products are formulated for everyday wear, meaning they are less likely to cause irritation during long events. Simply focus on layering your darker tones first, building up the dimension, and finalizing your look with sharp white highlights to complete the transformation.
How to Integrate Nails into Your Spooky Aesthetic?
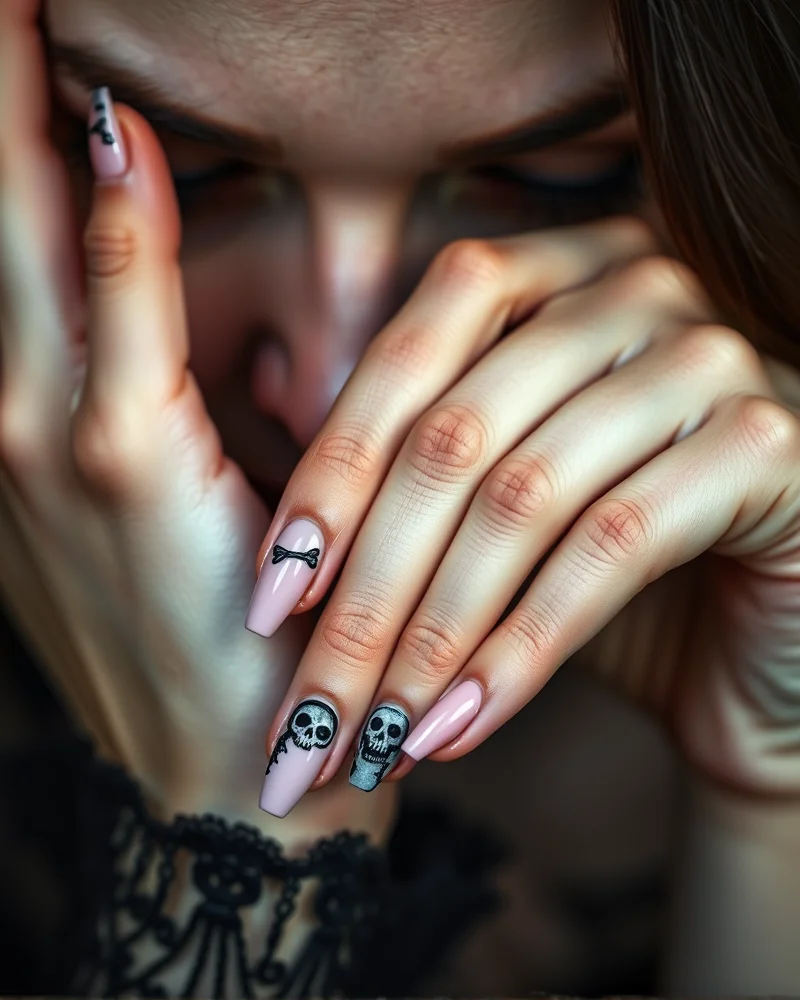
When you have perfected your spooky cute skull makeup, the transformation is only half complete if your fingertips remain an afterthought. Your manicure acts as the vital bridge that solidifies your entire aesthetic, turning a localized makeup look into a comprehensive style statement. Think of your nails as an extension of your face artistry. If you have opted for a soft gothic look with pastel pink shadows and delicate bone detailing, your manicure should echo that same color story rather than clashing with it. Coordination is key to achieving that high fashion editorial vibe where every detail feels intentional and cohesive. For instance, if you are incorporating intricate floral motifs near your cheekbones, consider using nail decals or hand painted vines on your ring finger to mirror those organic shapes. This creates a visual dialogue between your hands and your face, drawing the eye toward your gestures as you speak.
Achieving this level of harmony does not mean you have to recreate your entire face on your nails. Instead, focus on thematic continuity. If your skull makeup features metallic silver accents or glitter highlights, pair them with a chrome finish or holographic polish to maintain the shimmer. You might even find inspiration in unexpected places, such as the Dolly Parton makeup style, which emphasizes bold charisma and high contrast, to inform a manicure that balances spooky skulls with glamorous, high gloss finishes. Texture is another powerful tool in your arsenal. Matte black nails provide a sophisticated grounding effect for a neon skull look, while a glass effect top coat can add depth to darker, more monochromatic palettes. Professional artists often use negative space techniques to ensure the nails appear modern and sharp rather than cluttered. When you are ready to elevate your seasonal look, exploring our curated collections at Nailosmetic will provide the perfect shades and textures to match your creative vision. We have meticulously designed our palettes to ensure that whether you are going for a subtle nod to the macabre or a full on graveyard chic ensemble, your manicure serves as the ultimate accessory that completes your spooky cute metamorphosis.
What Are the Best Ways to Remove Heavy Makeup Safely?
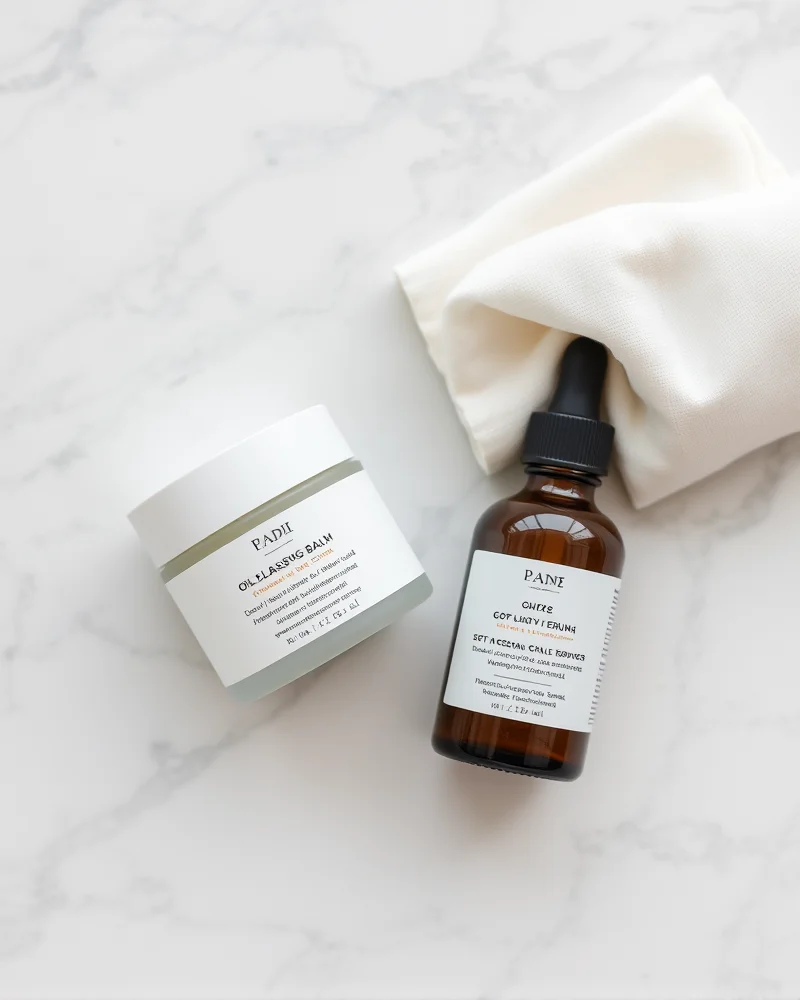
Q: Why is double cleansing essential after wearing heavy skull makeup?
When you transform your face into a masterpiece of spooky skull art, you are likely using long wear foundations, heavy pigmented grease paints, and perhaps even spirit gum or liquid latex. These products are designed to withstand hours of wear, which means they are highly resistant to water. A single wash with a foaming cleanser often fails to break down these stubborn bonds, leading to clogged pores, potential acne breakouts, and skin dullness. Double cleansing is the gold standard for post Halloween skincare. By starting with an oil based balm or a dedicated cleansing oil, you effectively dissolve the polymers and waxes in your makeup. This first step acts like a magnet, lifting away heavy pigments without the need for harsh scrubbing that can cause micro tears in your delicate skin barrier.
Q: What is the proper technique for using an oil based cleansing balm?
To safely remove your skull makeup, apply a generous amount of cleansing balm to your dry face. Massage the product in slow, circular motions for at least sixty seconds. This mechanical action loosens the adhesive properties of your skull art. Pro tip: pay extra attention to the areas around the eye sockets and the nose bridge where product tends to settle. Once the makeup has emulsified into the oil, add a splash of lukewarm water to turn the balm into a milky texture. Rinse thoroughly before moving to your second step, which is a gentle, pH balanced water based cleanser to ensure no residue remains.
Q: How can I exfoliate safely after wearing heavy face paint?
After the deep clean, your skin may feel slightly sensitive due to the physical removal of heavy pigments. While exfoliation is vital to remove dead skin cells and prevent congestion, you must avoid abrasive physical scrubs. Instead, opt for chemical exfoliants containing AHAs like lactic acid or gentle PHAs. These ingredients work by dissolving the glue that holds onto dull surface cells, revealing radiant skin underneath without damaging your moisture barrier. Follow this immediately with a hydrating serum containing hyaluronic acid and a ceramide rich moisturizer to replenish the hydration lost during your spooky celebration. Prioritizing dermatological health ensures your skin stays clear and glowing for your next makeup look.
Common Beginner Mistakes to Avoid
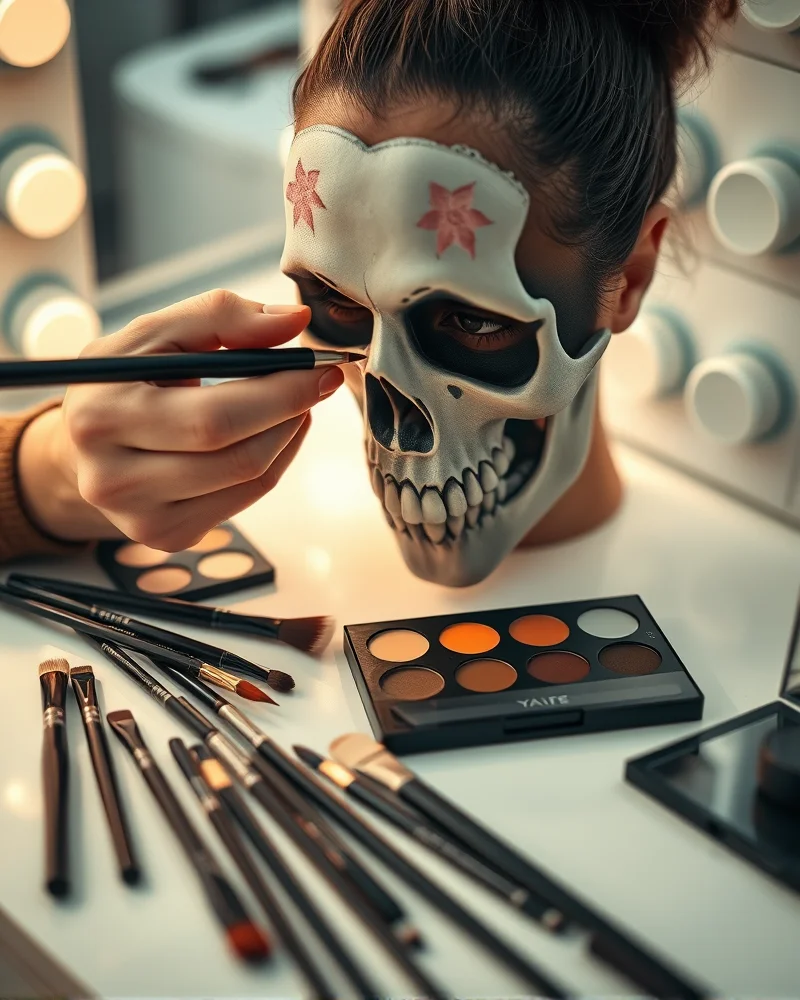
Even the most talented makeup artists started with a few smudged lines and dried out paint brushes. Mastering spooky cute skull makeup is an artistic journey, but several common pitfalls can turn a whimsical aesthetic into a messy disaster. Before you start blending, familiarize yourself with these five common beginner mistakes and the professional solutions needed to ensure your haunting look stays pristine all night long.
- Overloading Your Base Layer: Beginners often think more paint equals more impact, but applying thick, heavy layers of face paint is a recipe for cracking. Once the paint dries, it loses flexibility and will flake off as you move your face. Instead, apply your base in thin, translucent layers. Use a damp beauty sponge to press the product into the skin, building opacity gradually. This technique ensures a smooth, durable canvas that moves naturally with your expressions.
- Neglecting the Setting Process: Skipping the setting powder is the fastest way to ruin a skull design. Because cream paints remain tacky, they are prone to smudging or transferring onto clothing. Always lock your look in place using a translucent setting powder and a generous mist of professional grade setting spray. Use a soft powder puff to gently press the powder into the paint rather than swiping, which prevents streaks.
- Choosing the Wrong Brush Size: Using a single medium brush for everything from shading to fine line detail is a major mistake. Skull art requires precision, especially when outlining the teeth and eye sockets. Invest in a dedicated set of synthetic detail brushes. A tiny liner brush is essential for crisp, thin lines, while a slightly denser filbert brush is perfect for blending shadows along the cheekbones.
- Ignoring Natural Anatomy: A common error is drawing skull features that do not align with your own facial structure. Do not try to force a generic stencil shape onto your unique bone structure. Use your natural cheekbones as a guide for the hollows of your skull. By following your own facial contours, the result will look much more professional and anatomically convincing.
- Failing to Map Out the Design: Jumping straight into bold black pigment without a plan often leads to asymmetrical results. Always start by mapping your key anchor points with a light grey eyeliner or a soft pencil. This allows you to check for symmetry before committing to permanent, high pigment colors. If your line is off, you can wipe it away easily with a cotton swab before the main painting begins.
By avoiding these common hurdles, you transition from a beginner to a seasoned creator. Remember that patience is your greatest tool when crafting a spooky cute look that lasts.
Mastering spooky cute skull makeup is about balancing technical precision with artistic flair. By focusing on quality products, clean lines, and intentional color placement, you can create a high-impact look that stands out in any crowd. Remember, the detail is in the finishing touches—don’t forget to tie your look together with a stunning set of seasonal nails from Nailosmetic. Whether you’re aiming for a subtle, floral-laced skull or a bold, high-contrast masterpiece, the confidence is yours to wear. Happy haunting!