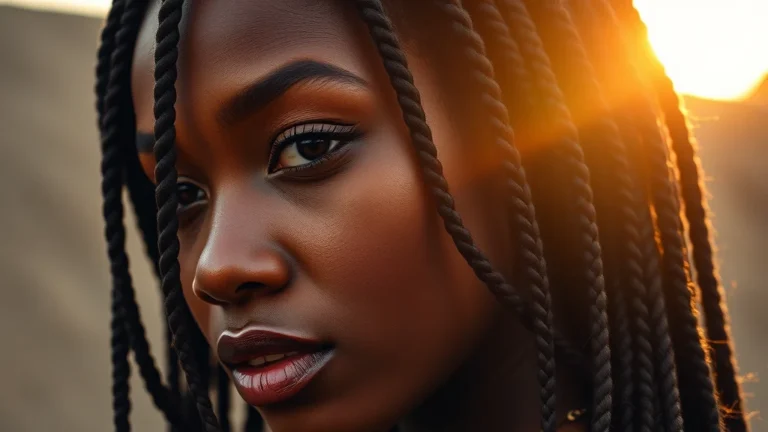
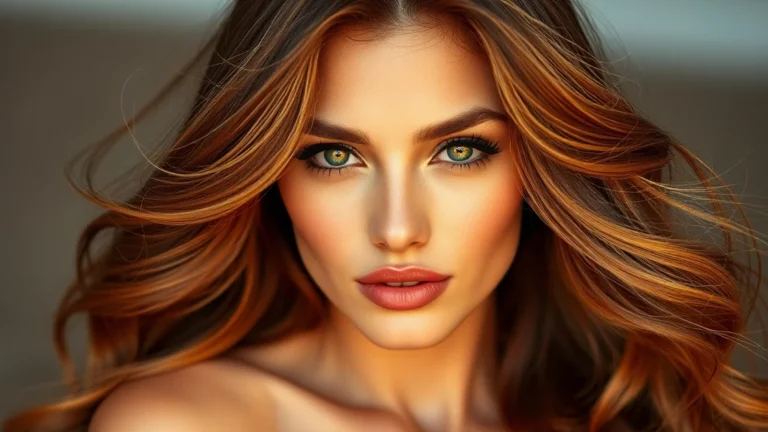
corpse bride glam makeup look

Achieving the perfect corpse bride glam makeup look requires balancing ethereal, ghostly undertones with high-fashion, modern artistry. In my professional experience, the secret lies not in heavy grey face paint, but in strategic contouring and precise color theory to capture Emily’s iconic, sorrowful beauty. Whether you are prepping for a high-end costume gala or a professional editorial shoot, this guide at Nailosmetic (check our latest collection at Nailosmetic homepage) breaks down the exact techniques to transform your complexion while maintaining an elevated aesthetic. By mastering the blend of cool-toned pigments and dramatic eye definition, you can transcend the typical ‘costume’ vibe to reach a hauntingly sophisticated level of glam. Forget the cheap Halloween kits; this is about refined artistry and long-wear precision that stays immaculate from midnight until dawn.
Why is the corpse bride glam makeup look trending this season?

The resurgence of the corpse bride glam makeup look marks a fascinating departure from the traditionally polished aesthetic that dominated social media for the past decade. We are witnessing a distinct cultural pivot toward gothic glam, a style that favors moody undertones, ethereal pallor, and intricate, romanticized morbidity. This aesthetic transcends the boundaries of niche theatrical cosplay by stripping away the heavy stage prosthetics and replacing them with sophisticated, wearable artistry. By blending high fashion editorial techniques like monochromatic contouring and diffused, smoky eye shadows with elements of Victorian sorrow, beauty enthusiasts are reclaiming macabre tropes for the modern red carpet and runway environments.
This trend thrives because it balances technical prowess with a sense of playful melancholy. It is not merely about replicating a costume. Instead, it is about utilizing high-end pigments, precise blending, and bold graphic liners to create a hauntingly beautiful persona that remains chic rather than cartoonish. Unlike traditional horror-inspired makeup, this style emphasizes skin luminosity and detailed texture, proving that dark, moody concepts can coexist with refined elegance. The shift speaks to a broader societal appetite for darker, more expressive self-identification within the beauty industry.
However, achieving this high-contrast look requires a rigorous commitment to canvas preparation. Because this style often involves layers of heavy pigment and matte foundations, the health of your complexion is non-negotiable. As highlighted by the American Academy of Dermatology, maintaining a strong skin barrier is essential when experimenting with heavy products, as improper removal or harsh formulas can lead to irritation and compromised dermal integrity. Before applying dense layers of white base or metallic silvers, ensure your skin is deeply hydrated and properly primed to prevent cracking or clogging. Prioritizing skin health ensures that your hauntingly artistic vision remains vivid and smooth rather than cakey. By treating your face as a high-end canvas, you bridge the gap between creative expression and professional skincare standards, turning the ethereal allure of this gothic phenomenon into a sustainable, high-fashion statement.
What are the essential products for a flawless corpse bride base?

Achieving that ethereal, otherworldly pallor requires a deliberate approach to base makeup. To master this haunting aesthetic, you must move beyond standard skin tones and embrace a spectral, cool-toned foundation that mimics the stillness of the afterlife. The goal is a velvety, matte complexion that looks ethereal rather than heavy, ensuring the skin appears remarkably smooth despite its ghostly hue.
- Spectral Foundation: Seek out a full coverage, pale foundation with distinct blue or cool undertones. If you cannot find a specific shade, mix a high pigment white foundation or a blue color corrector into your lightest liquid formula. This creates a dewy yet drained canvas. Ensure you blend down the neck and onto the ears to avoid an obvious mask effect.
- Cream Contouring: To capture the hollow, sunken look of a character from the beyond, utilize a cool toned grey or taupe cream contour stick. Apply this under the cheekbones, along the jawline, and across the temples to carve out sharp, skeletal features. Cream products are essential here because they melt into the skin, preventing the chalky finish often associated with powder-only contouring.
- Matte Setting Powders: Because moisture can cause your base to shift, locking it in with a translucent, finely milled powder is vital. A colorless setting powder maintains the integrity of your blue-tinted foundation without adding unwanted warmth. Focus heavily on the T-zone and under the eyes to ensure a long wear finish that holds up through any dramatic event or photoshoot.
- Skin Priming: Before applying any pigment, ensure your skin is prepped correctly to avoid irritation. According to the American Academy of Dermatology, maintaining a strong moisture barrier is crucial when using heavy theatrical makeup, so apply a non-comedogenic primer to keep the skin hydrated beneath your layers of product.
The final touch for this corpse bride glam makeup look is achieving a dead but glam finish. By using a setting spray with a satin finish after powdering, you take away the flat, dusty appearance of too much powder while keeping the base firmly in place. The result is a luminous yet ghostly complexion that bridges the gap between high fashion editorial and gothic fantasy.
How do you achieve the perfect ghostly contour?
Achieving an ethereal, otherworldly appearance requires a complete departure from traditional cosmetic warmth. To craft the perfect ghostly contour, you must abandon all golden bronzers and sunset-hued palettes. Instead, look toward a spectrum of cool-toned pigments that mimic the pallor of the afterlife. Begin by selecting a matte cream or powder contour in a muted taupe or deep ash grey. These shades serve as the foundation for hollowing out the cheekbones, temples, and jawline, effectively stripping away the healthy vibrance of living skin. Apply your chosen shade using a precision brush, focusing heavily on the hollows of your cheeks to create a sharp, skeletal definition that captures that iconic Victorian-inspired sadness.
Once the foundational grey structure is established, introduce depth by layering cool-toned purples or dusty mauves into the recessed areas. These bruised undertones simulate the translucent quality of skin that has long since departed from the mortal coil. By blending these violet pigments into the edges of your grey contour, you create a seamless gradient that appears to emerge from beneath the skin rather than sitting on top of it. This layering technique is essential for capturing the authentic corpse bride glam makeup look without appearing overly muddy. Focus your blending strokes in an upward motion to maintain an elongated, sophisticated silhouette that complements your overall aesthetic. If you are also planning your full ensemble, you might want to explore various hairstyles for women that can further elevate this hauntingly beautiful style, as volume and texture play a crucial role in framing a ghostly face.
For those with sensitive skin, it is vital to ensure your products are non-comedogenic and appropriate for prolonged wear, as verified by experts at the American Academy of Dermatology. Always set your finished contour with a translucent, silica-based powder to lock in the matte finish, ensuring the sculpted hollows remain crisp through hours of wear. By meticulously avoiding warm-toned products and focusing on these shadowy, melancholic hues, you transform your visage into a masterwork of gothic elegance that feels both timeless and hauntingly precise.
What is the secret to the signature corpse bride eye makeup?

The signature look hinges on a marriage between architectural precision and ethereal decay. To achieve the iconic gaze, begin by mapping out a graphic liner shape that extends well beyond the natural lash line, pulling the pigment into a sharp, elongated wing that mimics a melancholic, drooping eye shape. I recommend using a waterproof liquid liner to establish the base, then transitioning to a matte black eyeshadow on an angled brush to diffuse the edges. By softly buffing the pigment outward, you create a seamless transition from deep charcoal to skin tone, which prevents the look from appearing overly harsh or cartoonish.
For the shimmer placement, focus your attention on the center of the eyelid and the inner corner. Apply a high-pigment, cool toned iridescent silver or icy blue shimmer. This light reflection provides the necessary ghostly contrast against your darkened, smoky orbital bone. The secret to elegance here is keeping the sparkle contained to the center of the lid, allowing the matte perimeter to frame the eye with depth and gloom. Ensure your skin barrier is prepped and hydrated before applying these pigments to prevent irritation, as advised by the American Academy of Dermatology.
Lash styling is the final pillar of this transformation. Instead of opting for uniform, voluminous falsies, utilize individual clusters of varying lengths. Concentrate the longest wisps at the outer corners to enhance the downward slant of the liner. To master the lived-in smudge technique, take a dark plum or espresso pencil liner and run it along the lower lash line. Use a small, dense pencil brush to smudge the product downward into your lower lid, blurring the line until it appears faded and worn. This deliberate lack of crispness on the lower lash line is what separates a standard gothic aesthetic from a high-fashion editorial interpretation of the deceased bride. Finish by blending a tiny amount of cool-toned grey cream product into the lower lash smudge to simulate a haunting, sunken appearance without appearing unkempt.
How to create the iconic stained blue lip?
Embracing the Ethereal Hue: Understanding the ‘Decomposed’ Palette
Creating the iconic stained blue lip for a spectral aesthetic demands a nuanced understanding of color theory. This is not about a vibrant, primary blue; instead, we aim for a hue that suggests prolonged cold, a hint of ancient decay, and otherworldly beauty. Think less ‘Smurf’ and more ‘Victorian porcelain doll brought to life by dark magic’. The key lies in desaturating and muting true blue tones with hints of cool berry or muted plum. This process softens the starkness of a pure blue, giving it that ghostly, melancholic depth reminiscent of Emily from the timeless film. The goal is a blue that appears almost bruised or frozen, carrying a subtext of deep sorrow and ethereal grace, crucial for any truly authentic interpretation of this dramatic character.
The Canvas Prep: Ensuring a Feather-Proof, Long-Wearing Base
For any intense lip color, particularly one that needs to endure through an entire night of haunting glamour, meticulous lip preparation is non-negotiable. Begin with a gentle lip exfoliant to remove any dry, flaky skin, ensuring a smooth surface for uniform color application. Follow with a rich, hydrating lip balm, allowing it to sink in for a few minutes before blotting away any excess. The final, crucial step is a dedicated lip primer. A quality lip primer creates a barrier, fills in fine lines, and provides a tacky base that grabs onto pigment, significantly extending wear time and preventing dreaded feathering or bleeding outside the lip line. For comprehensive lip health and care tips, exploring resources like the American Academy of Dermatology provides excellent guidance on maintaining optimal lip condition.
Architecting the Shape: The Role of Lip Liner for Definition and Depth
Lip liner is your secret weapon, serving far beyond mere definition for this specific look. Choose a liner that complements your decomposed aesthetic. A muted, deep plum, a cool-toned brown, or even a deep charcoal grey liner will work wonders to create a shadowed edge and provide a foundational color layer. Avoid bright or warm pinks. Carefully outline your lips, then fully fill them in with the liner. This step creates an opaque base that enhances the intensity of the subsequent blue layers, acts as a stain itself, and crucially, establishes an impenetrable barrier to prevent your mixed lip color from migrating into the fine lines around your mouth. It essentially anchors your elaborate lip creation.
The Alchemy of Color: Mixing Your Signature Blue-Berry Stain
Now for the artistic blending that defines this iconic lip. You will need at least two lip products: a true blue matte or satin lipstick and a deep berry, plum, or even a sheer black lipstick. Start by applying a thin, even layer of your chosen blue lipstick. Popular choices include deep navy blues or desaturated periwinkle shades, avoiding anything too vibrant or glittery. Next, gently tap or layer a small amount of your plum or berry lipstick over the blue. The goal is to subdue the blue, giving it a ‘bruised’ or ‘frozen’ quality. If your blue is too bright, a touch of sheer black lipstick can help deepen and desaturate it further. Experiment with ratios on the back of your hand first. Apply the mixed color to your lips using a lip brush for precision, dabbing and blending the edges with your fingertip to achieve that soft, diffused ‘stained’ effect rather than a harsh, defined line. The slight unevenness in pigment from tapping contributes to the beautifully eerie, organic look.
Setting the Scene: Locking in Your Lasting Impression
To ensure your elaborate blue-berry lip remains flawless and transfer-proof through all your otherworldly endeavors, setting is paramount. After applying your blended lip color, gently blot your lips with a single ply of tissue paper to remove any excess emollients, leaving behind maximum pigment payoff. Next, take a small, fluffy brush and lightly dust a translucent setting powder over your blotted lips. This step mattifies the lip, further locks in the color, and prevents smudging. For ultimate longevity, a final mist of a long-wear setting spray over your entire face, including the lips, will create a protective barrier. This multi-layered approach guarantees your blue stained lip will maintain its haunting allure without feathering or fading, embodying the enduring spirit of a truly captivating, decomposed beauty.
What techniques ensure your makeup survives the entire night?
When you are channeling the ethereal, otherworldly aesthetic of a corpse bride glam makeup look, the biggest challenge is preventing your base from shifting while you celebrate. Because this style relies on heavy coverage and high-contrast pigments, even minor smudging can ruin the delicate balance of your spectral transformation. The secret lies in a rigorous chemical hierarchy that begins with a solid foundation and ends with a bulletproof seal.
| Technique | Key Benefit | Pro Tip |
|---|---|---|
| Silicone-based Primers | Smooths texture and fills pores | Best for long wear on oily skin types. |
| Water-based Primers | Provides hydration for dry skin | Use if your foundation is also water-based. |
| Baking with Translucent Powder | Prevents creasing and oil breakthrough | Dust off excess after five minutes. |
| Film-forming Setting Sprays | Locks pigments in place for hours | Apply in an X and T motion. |
Choosing your base products requires understanding the compatibility of your ingredients. Using a silicone-based primer with a water-based foundation often leads to separation and pilling, which is the last thing you want for a high-concept look. If you are aiming for a crisp, haunting appearance, ensure that all your base layers share a similar chemistry. Those who often style their hair into short hair bob cuts for thick hair will find that a well-prepped base prevents makeup transfer onto the collar during costume changes.
To truly lock in your look, incorporate a baking technique around the under-eye area and the T-zone. By applying a thick layer of loose translucent powder and letting it sit, you allow your skin heat to set the concealer into a crease-resistant film. Following this, a film-forming setting spray is essential. These sprays contain polymers that create a thin, flexible shield over the skin, protecting your pigments from moisture and friction. For individuals with sensitive skin, it is always wise to consult guidelines from the American Academy of Dermatology to ensure your heavy-duty makeup removal process does not compromise your natural skin barrier after the night concludes. Ultimately, the durability of your ghostly appearance depends on the synergy between your primer and your final setting stage.
Should you use fake blood or gore with this look?

When conceptualizing your Emily-inspired ensemble, the temptation to reach for theatrical stage blood is understandable given the cinematic source material. However, for a sophisticated interpretation of this character, we strongly advise against the visceral route. Staining your skin with crimson liquid latex or syrupy faux fluids often detracts from the ethereal, delicate quality that makes this aesthetic so mesmerizing. By prioritizing a glam approach, you pivot from a costume party vibe toward high-fashion editorial artistry. The goal is to capture the haunting beauty of a spectral spirit rather than the harshness of a horror film. When you swap liquid gore for strategic ornamentation, you preserve the porcelain finish of your base makeup and ensure your overall look remains polished and photogenic for the entire evening.
Elevating your aesthetic is best achieved through the precise application of intricate textures that mimic the decaying elegance of a wedding gown. Instead of messy red stains, incorporate delicate lace appliques around the eyes or hairline to simulate a tattered veil aesthetic. These lace details provide an intricate, Victorian-inspired focal point that feels intentional and refined. To enhance the dimension of your face, utilize high-quality AB finish rhinestones or iridescent crystals. Place these along your cheekbones or the inner corners of your eyes to reflect light, mimicking the way moonlight dances off a ghostly figure. This approach adds a multidimensional sparkle that flatters the skin rather than overwhelming it.
For those concerned about skin health when applying these embellishments, always ensure you are utilizing professional-grade, skin-safe adhesive meant for cosmetic use to prevent irritation, as highlighted by expert guidance from the American Academy of Dermatology regarding safe makeup practices. Consider applying pearl-toned pigments or loose shimmer over your contour to soften the edges of your blue and grey shading, blending the lines until they appear ethereal. By choosing lace and light-reflective stones over artificial trauma, you curate a look that is hauntingly beautiful, fashion-forward, and entirely unique. This sophisticated pivot ensures your presence is defined by grace rather than shock value, positioning your appearance as a masterclass in thematic beauty.
How can nail art complement your corpse bride glam makeup look?

Your manicure serves as the final, structural component of your aesthetic, acting as an extension of the storytelling found in your spectral, high-fashion visage. When you commit to a corpse bride glam makeup look, your nails should not merely match your attire but rather reflect the decaying elegance of the underworld. To achieve cohesion, focus on a color palette that mimics moonlight reflecting off cold, Victorian marble or deep, subterranean waters. Opting for intense, deep cobalts creates a striking contrast against the pale, ghostly foundation of your skin, drawing the eye toward your hands as you gesture or hold accessories. You might consider an ombre effect that transitions from a bruised, midnight blue at the base to a translucent, frost-bitten white at the tips, effectively mimicking the ethereal, fragile nature of Emily herself.
Texture plays a pivotal role in elevating the visual narrative. Incorporating chrome silvers provides a metallic, industrial edge that feels modern yet distinctly ghostly, simulating the shimmer of skeletal structures or ancient, forgotten jewelry. For a more avant-garde approach, shattered glass effects are essential. By layering irregularly shaped shards of holographic foil over a dark base, you mimic the appearance of broken mirrors or fractured porcelain, which perfectly aligns with the fragmented, tragic heart of the character. This technique adds depth and light refraction, ensuring your nails remain a focal point under party lighting.
Before applying these complex textures, prioritize nail health to ensure your base is resilient enough for heavy adhesives or metallic pigments. Keeping your cuticles hydrated is vital, as dry, cracked skin detracts from the polished finish of a gothic ensemble; you can find excellent guidance on maintaining skin integrity at the American Academy of Dermatology Association website at https://www.aad.org. Consider finishing your set with a matte topcoat to dull the shine, adding an air of dusty, long-buried mystery, or a high-gloss finish to lean into the glamorous, cinematic interpretation of the undead. Whether you choose jagged, coffin-shaped extensions or rounded, natural lengths, your nail art should feel like a deliberate, haunting continuation of the artistry you applied to your face.
What are the common mistakes to avoid?
- The Orange Undertone Trap: Many enthusiasts attempting this haunting aesthetic make the mistake of using standard bronzers or warm foundations. Because this look demands a cool, ethereal, or even necrotic palette, any hint of orange or sun kissed warmth will clash with the grayscale or blue tinting required for the undead aesthetic. To correct this, utilize high pigment white foundation mixers or cool toned lavender color correctors to neutralize your skin tone before applying your base. If you are new to these darker, unconventional styles, I highly recommend checking out this guide on goth makeup for beginners to help you master color theory before attempting more advanced spectral transformations.
- Unblended Edges and Harsh Lines: A common amateur error is leaving visible edges where the foundation meets the hairline or jawline, which ruins the illusion of a seamless phantom complexion. Achieving the translucent, dusty appearance of a departed spirit requires excessive blending. Use a damp, high quality beauty sponge to press product into the skin rather than dragging it, which prevents streaking. If you notice harsh lines around the eyes or cheeks, take a clean, fluffy blending brush and buff the edges in circular motions until the pigment fades softly into your natural skin tone.
- Dry Skin and Texture Buildup: Elaborate spectral makeup often requires heavy layers of matte products or face paint, which can cling to dry patches and make the skin look aged or cakey. The American Academy of Dermatology emphasizes the importance of proper skin hydration to maintain a healthy barrier, especially when using heavy theatrical makeup, so always start with a hydrating primer and wait for it to dry fully before applying your base. Pro-tip: gently exfoliate your skin with a mild chemical exfoliant the night before to ensure a smooth canvas. If you find your foundation is cracking throughout the event, use a setting spray infused with glycerin to rehydrate the layers without disturbing the pigment.
- Overlooking the Neck and Ears: The most jarring mistake is finishing your facial makeup and leaving the neck or ears their natural color. When you are going for a pale, icy corpse bride glam makeup look, the contrast between a ghostly face and a warm neck destroys the immersion. Always extend your base shade down the neck, over the collarbone, and around the ears to create a cohesive spectral appearance that looks purposeful rather than accidental.
Frequently Asked Questions about corpse bride makeup
- Q: What is the best way to achieve the signature blue skin tone for a Corpse Bride glam makeup look?
- To capture the iconic undead aesthetic, start by applying a high quality water based blue face paint over a white base layer. Use a damp beauty sponge to build opacity, focusing on blending toward the hairline. For a professional finish, set the cream pigment with a translucent setting powder or a blue toned eyeshadow to prevent smudging. Always prioritize skin safety by ensuring your products are non-comedogenic and hypoallergenic, as recommended by dermatologists at aad.org to avoid irritation.
- Q: How do I make the skeletal features appear realistic without looking too messy?
- Precision is essential for structural contouring. Use a sharpened black or dark grey eyeliner pencil to sketch the hollows of your cheeks, temples, and jawline. Once the layout is set, transition to a matte eyeshadow palette to blend the edges outward for a soft, diffused shadow effect. Adding subtle white highlights along the cheekbones and bridge of the nose will create depth, giving your face a dimensional, skeletal appearance that feels sophisticated rather than theatrical.
- Q: Can I incorporate glitter into this specific undead aesthetic?
- Absolutely. While the character is known for being faded and worn, adding a touch of iridescent or holographic glitter to the inner corners of your eyes or across your collarbones adds a modern glam twist. Use a cosmetic grade glitter adhesive to secure the particles, ensuring they stay in place throughout the evening. This contrast between the decaying corpse bride glam makeup look and ethereal sparkle creates a captivating, high fashion impact that elevates the costume from traditional to editorial.
- Q: Is liquid latex safe to use for creating texture on the skin?
- Liquid latex is excellent for simulating peeling skin or scars, but it must be handled with extreme care. Always perform a patch test on your inner forearm 24 hours before application to check for allergic reactions. When applying near the eyes or mouth, be extra cautious. If you have sensitive skin, opt for alternatives like scar wax or adhesive bandages, which are often gentler and easier to remove without damaging your natural skin barrier.
Mastering the corpse bride glam makeup look is about mastering the details—the slight shift in contour tone, the precise placement of silver shimmer, and the structural integrity of your base. By focusing on cool-toned pigments and high-fashion application, you elevate a character-inspired look into a work of art. Remember that the beauty lies in the blend; keep your edges soft and your intentions bold. Use this guide as your blueprint to achieving a look that is both haunting and undeniably sophisticated for your next event.